User Manual for CBAB-Database (Cremation Bronze Age Burials)
Last updated: Dec 15th, 2017
- Overview
- Who can use CBAB?
- What can you do without a CBAB-Account?
- What can you do with a CBAB-Account?
- Why should I enter data?
- What to enter in the CBAB-Database?
- What not to enter in the CBAB-Database?
- How to enter data in CBAB?
- Navigating the Web Application
- How to create a new Burial site
- How to search for Burial Sites
- How to create a Burial group
- How to search for Burial Groups
- How to create a Burial
- How to search for Burials
- How to Create an Urn
- How to search for Urns
- How to Create an Urn cover
- How to search for Urn covers
- How to Create a Grave Good
- How to search for a Grave Good
- How to enter anthropological results in CBAB
- How to browse or search for anthropological results
- How to create Organic Grave Goods
- How to browse or search for Organic Grave Goods
- How to enter Animal Remains
- How to browse or search for Animal Remains
- How to analyze the Data
- How to come to the single burials of your filtered list
- How to start a new search
Overview
Who can use CBAB?
CBAB is intended to be an open share database free to use for everybody interested in cremation burials dating to the European Bronze Age.
What can you do without a CBAB-Account?
You can browse the data for basic information on burial sites (location, number of burials, literature, scientists in charge of the material, etc.), specific burials (eg. Grave 15 in Franzhausen-Kokoron, Austria) and create maps for e.g. talks or papers.
What can you do with a CBAB-Account?
Furthermore you have the opportunity to make enquiries about certain data e.g. burial
features like grave types combined with anthropological data or grave goods. In order to use
this service you need an account that gives you full access to the CBAB-Database.
With
this account you can not only customise your enquiries but also create burial sites and
burials in the database yourself.
Why should I enter data?
Because more data available in CBAB will give you and others more research options, better enquiry results, more accurate mappings and bring your own work in front of a bigger audience.
What to enter in the CBAB-Database?
- any cremation burial you like, if it is a (potential) Bronze Age grave
- any archaeological site including excavated Bronze Age cremation burials
If only part of a cemetery was excavated, you can create a new Burial Site and enter the excavated cremations (see How to create a Burial Site?)
What not to enter in the CBAB-Database?
- any inhumation grave or cremation burials from other periods e.g. Early Bronze Age or Iron Age If such graves appear within a (biritual) cemetery that provide Bronze Age cremation burials, you can mention them in a textbox implemented in the Burial Site form (see How to create a Burial Site?)
- any features only known from archaeological surveys
The CBAB-Database asks for very detailed information on Bronze Age cremation burials in order to provide researchers with detailed information on this specific burial form. Therefore CBAB demands excavated burials to maximize the knowledge on cremations.
How to enter data in CBAB?
- ask for an account to be able to curate data
- check if the literature you want to quote is already in the CBAB-Zotero database;
if not please contact the database-team, who will put it in Zotero for you - create the burial site
- from the location you can start to curate a burial
- from the burial you can enter more specific information on e.g. the urn vessel, grave goods, anthropological results, etc.
Navigating the Web Application
How to create a new Burial site
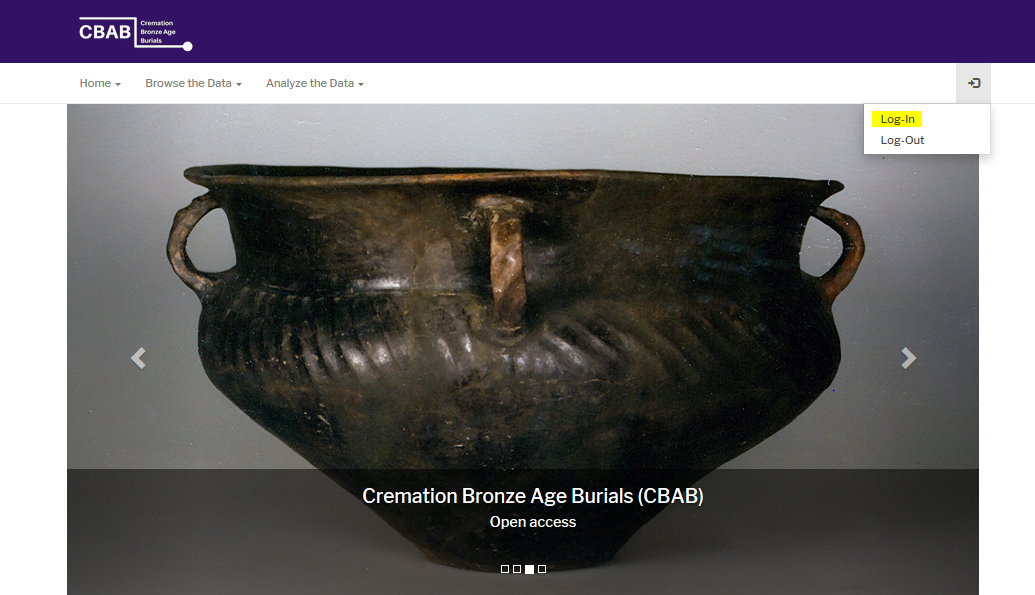
Go to https://cbab.acdh.oeaw.ac.at and log in with your personal credentials on the right side of the top bar.
Click Curate and Browse the Data and choose Locations.
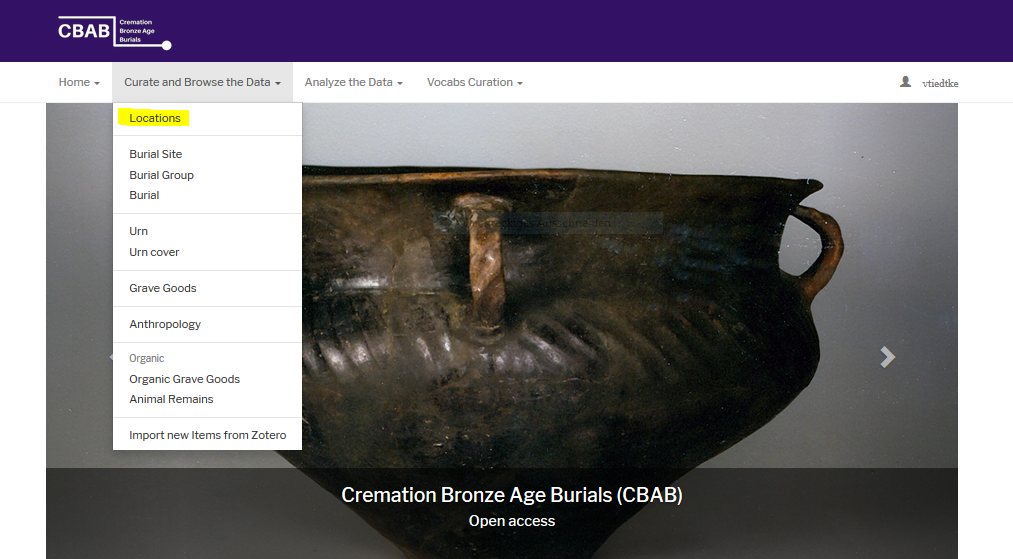
Check if the burial site you want to create is in or close to any of the mentioned locations. Locations are not equal to archaeological sites! A location is a geographical place (e. g. a village or town) which can include several archaeological sites.
If there is no location for the burial site you wanted to enter, create first a new place (location) with add another Place.

Enter the name of the place (location) and start typing the country's name into Province. The drop down list has an autocomplete function and you should be able to find the province in seconds SAVE.
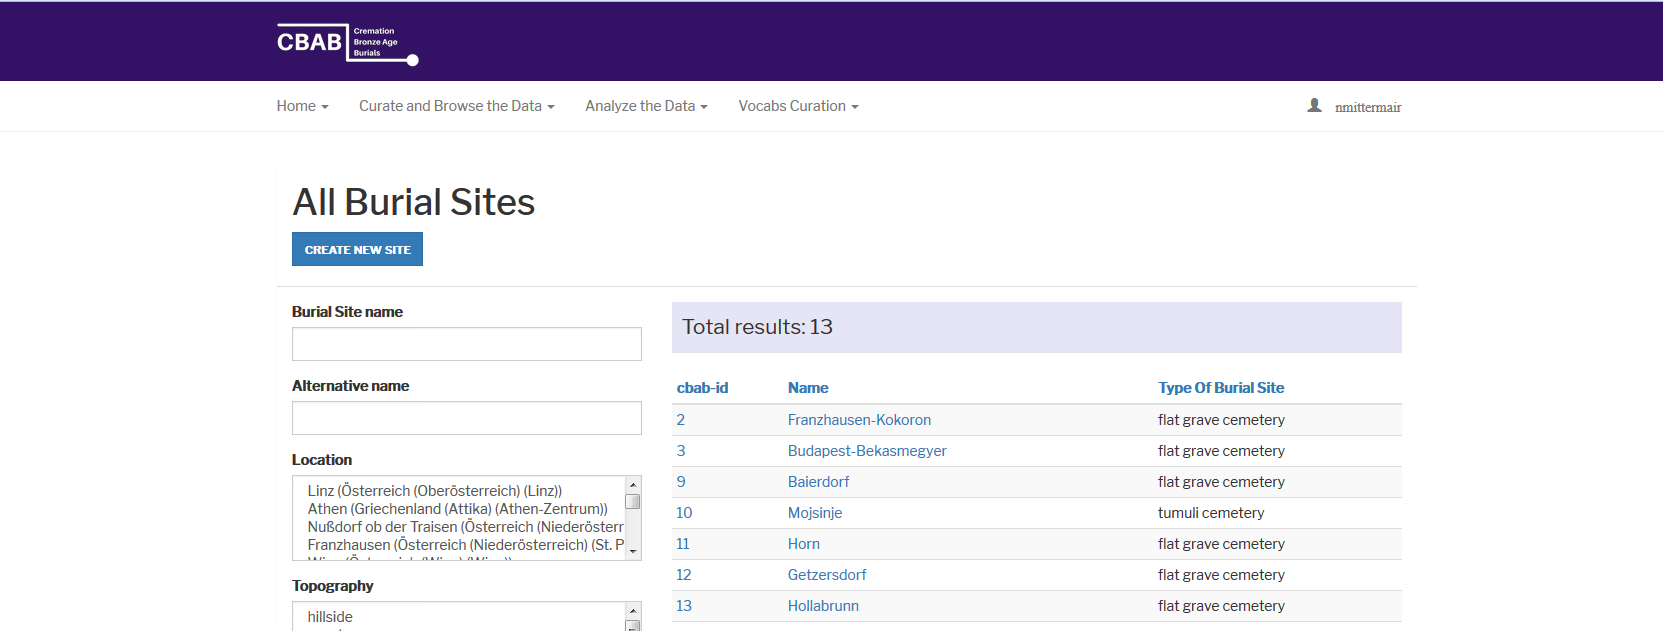
After having saved the new place (location) click Curate and Browse the Data and choose Burial Site. Press the button Create New Site.
Start filling out the form by using the official name of the burial site and (if existing) its alternative name (eg. Bügeleisenschnitt, Walter 81, Ugly Tree, etc.).
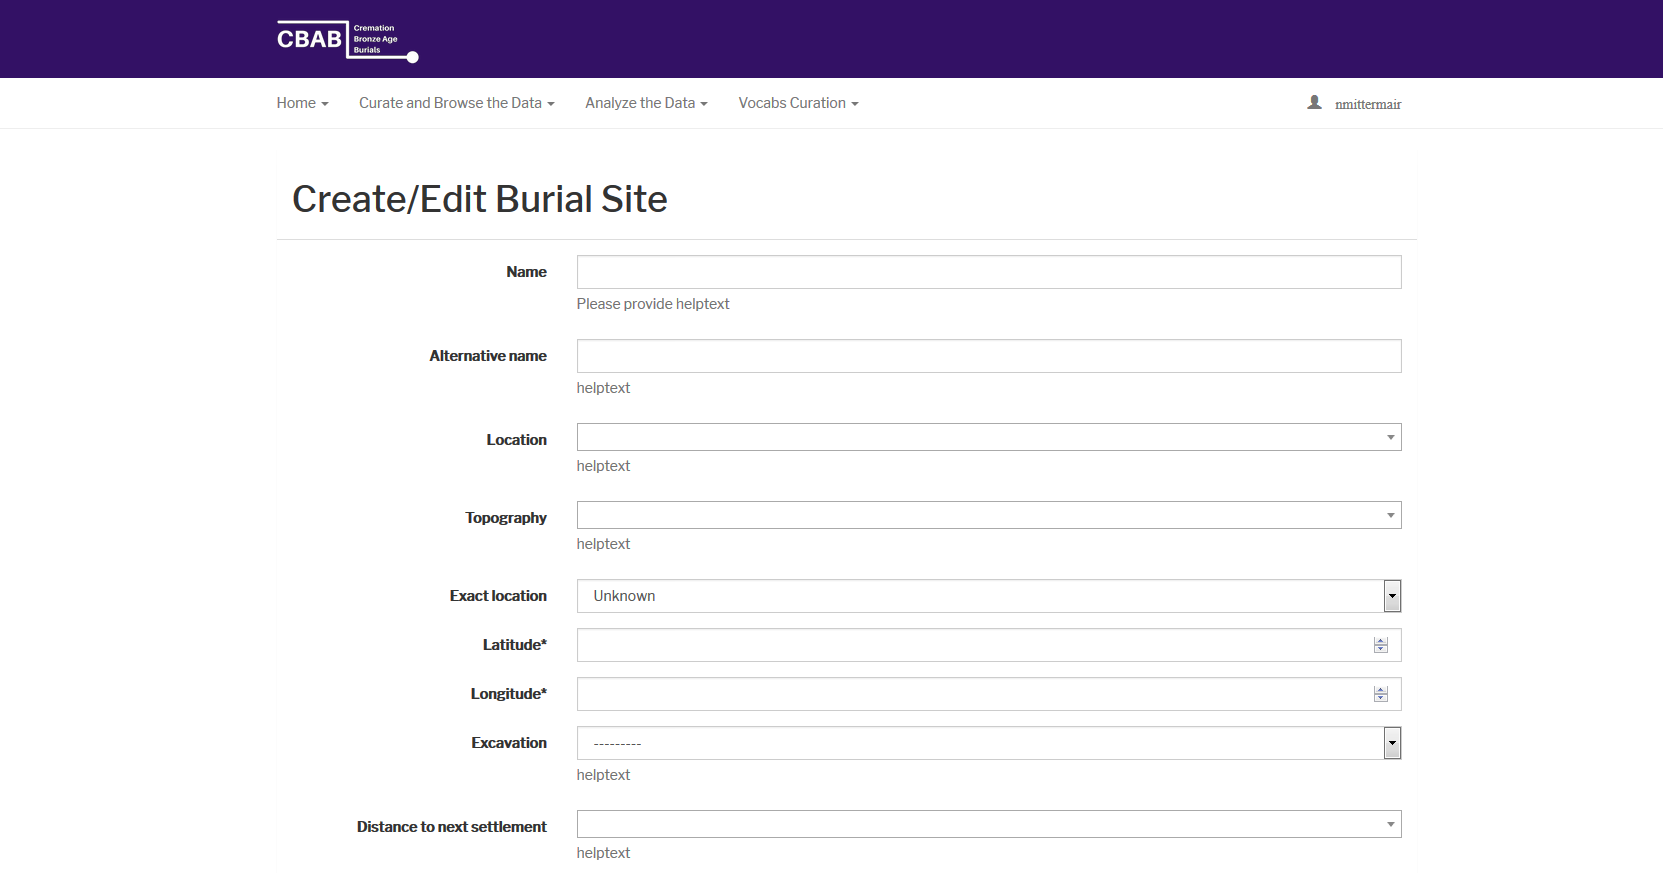
Start filling out every box as exactly as possible with the help of the
drop down lists.
Please notice: all drop down lists come with an autocomplete
function and you have to choose one option. If you find a specific term
missing in a list please contact the database-team.
Latitude and Longitude are both mandatory for creating a burial site.
If the literature or excavation documentation do not provide you with Latitude
and Longitude, please use google maps to complement them.
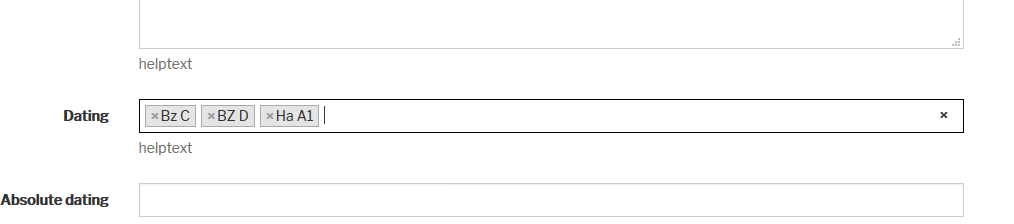
Disturbance and Absolute Dating need to be filled out, if you have anything to report. If you have C14-dates please quote the sample numbers (eg. KIA 4382).
Dating is the only drop down list, where you can choose several terms. So if the urn field contains Bz D, Ha A and Ha B burials you choose these three options.
Location of archaeological material and contact information are not mandatory. If you don’t have the information who is in charge of the material or where it is kept, please mention this in the box.
Reference is a drop down as well, which functions with the literature in the Zotero-database. Just remember, if you like to add references, you first have to be put in the Zotero-databse by the CBAB-Team (send us an email).
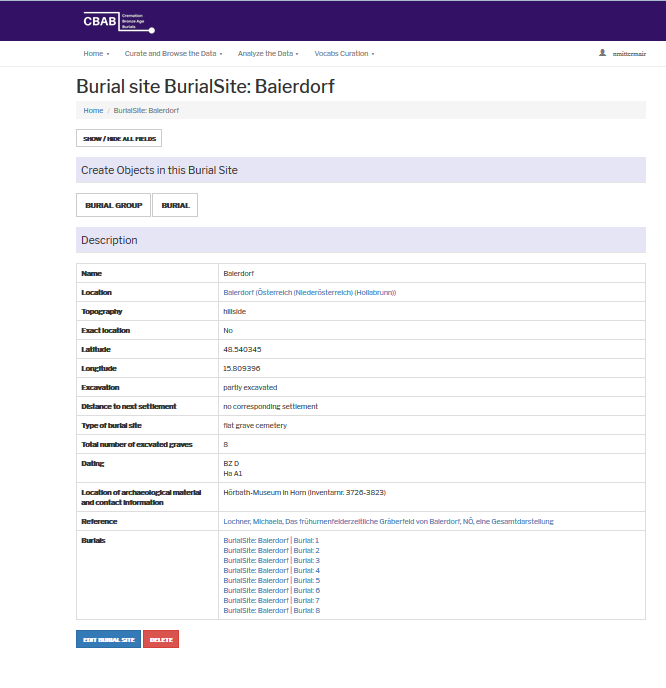
By Save you will come to the overview of the Burial Site that you just created. If you want to change any of Burial Site properties (Disturbance, Dating, Location of archaeological material etc.) please click the button Edit Burial Site and save again the changes that you made.
How to search for Burial Sites
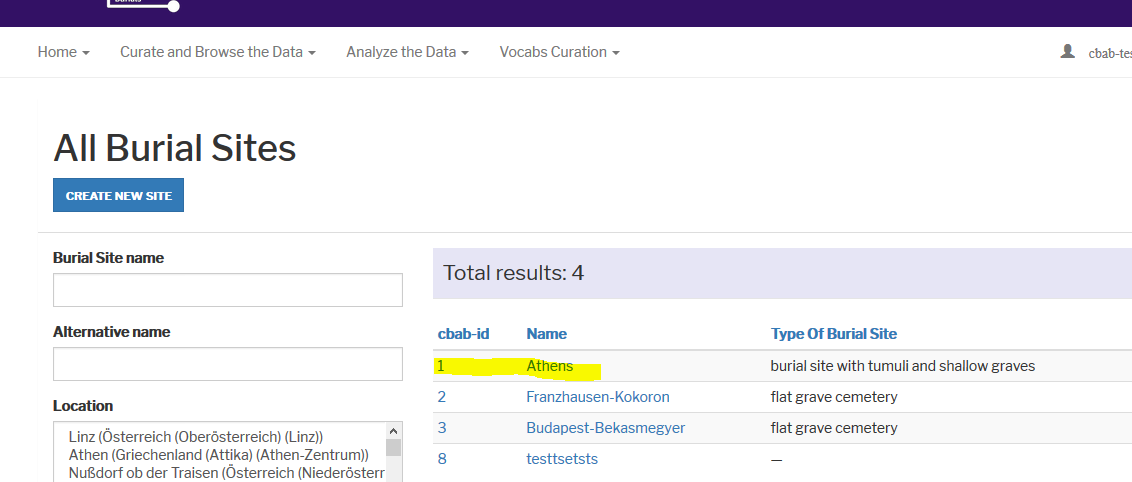
Click Curate and Browse the Data and choose Burial Site. This will bring you to All Burial Sites with the list of all Burial Sites in the database (on the right of the screen). Click on the Name or cbab-id and you will see a general page with all the information regarding this specific burial site, including the list of all entered Burials.
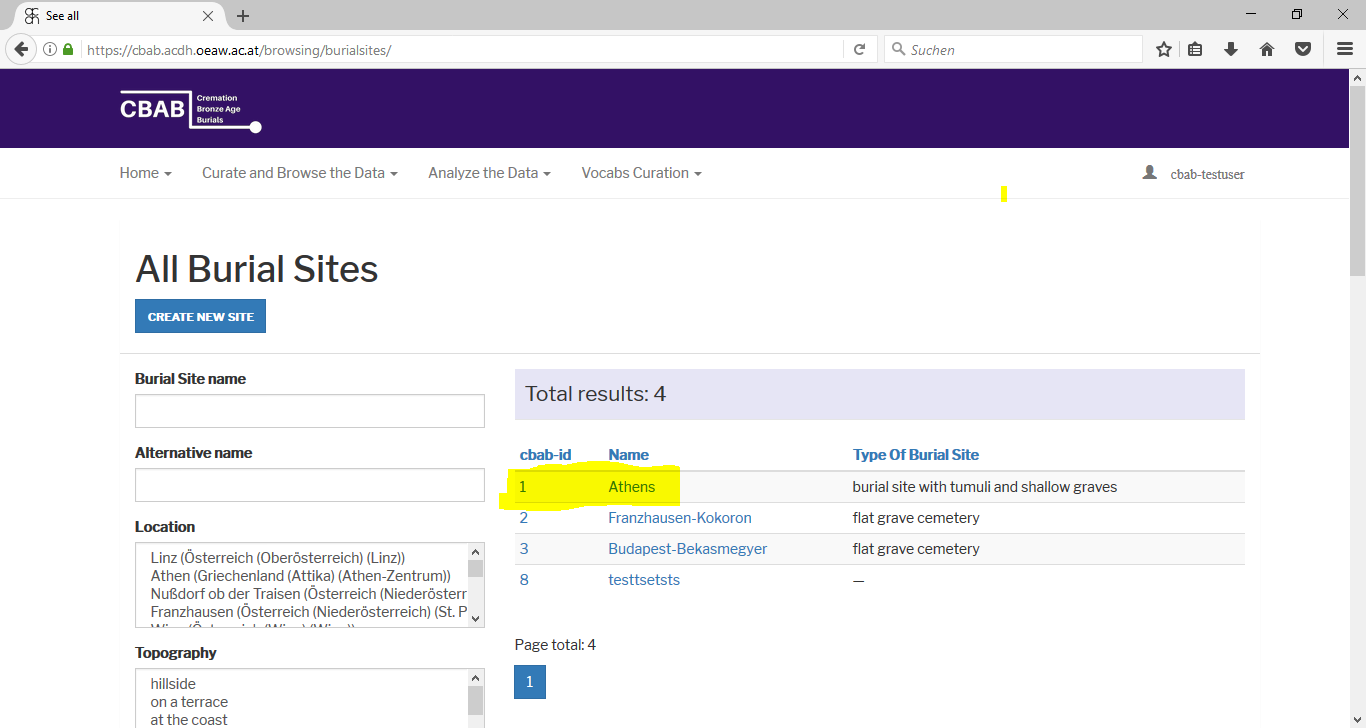
Or: You can enter the name of the specific Burial Site in the box Burial Site name (first box on the top left) and click Search.
If you look for burial sites with special properties:
You can choose every property concerning burial sites (Location, Topography etc.) in boxes by filtering in the left of the page.
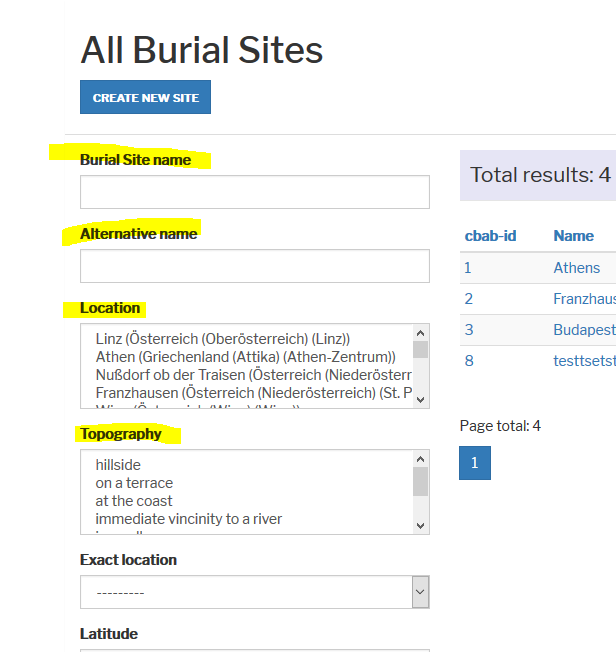
Pick the things you are interested in (e. g. hillside in Location, Ha A in Dating and <100m in Distance to next settlement) and click Search.
This will give you a list of all the burial sites featuring the properties you picked. From there you can again go to the burial site by clicking on the Name or cbab-id. This will bring you to the general information page on this burial site.
How to create a Burial group
Definition:
A Burial group is number of graves being connected to each other by
either some architectonic feature (e.g. a grave hill or fencing) or just a close spatial
arrangement and being named by the excavation team “burial group”.
There are two ways to create a Burial group.
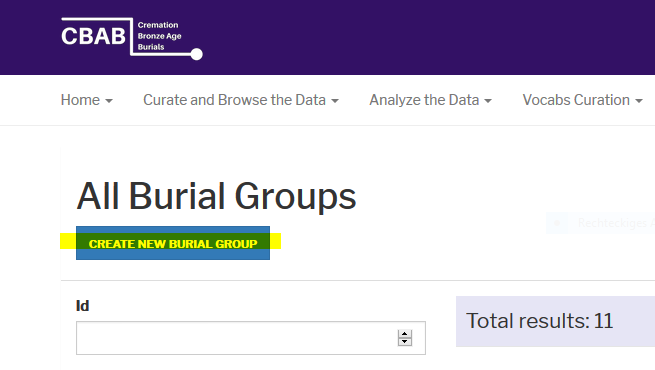
- Go to Curate and Browse the Data and choose Burial Group.
Underneath the title All Burial Groups you find the button Create New Burial Group. Follow C) - Or you first go to the Burial Site you would like to create a Burial
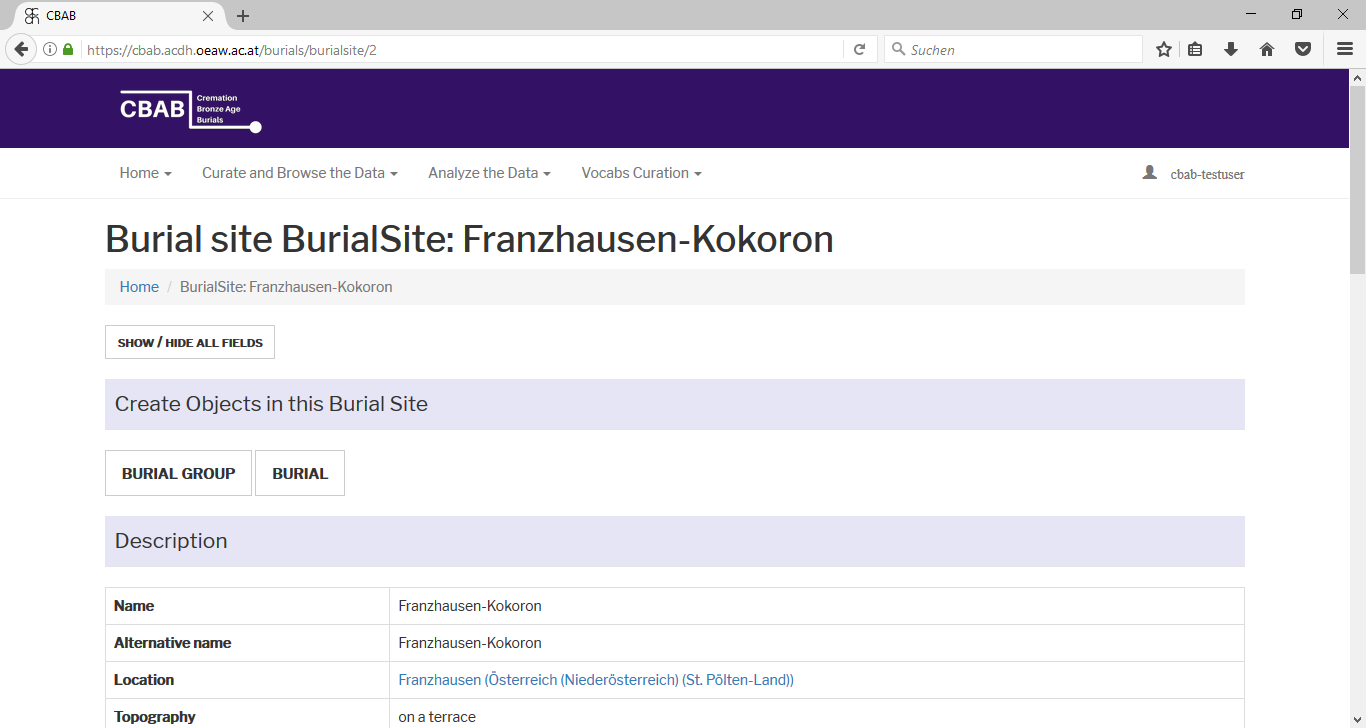
group in. You can find burial sites in All Burial Sites.
Clicking on the Name (e. g. Athens, Franzhausen-Kokoron) brings you to the general page on the Burial site you chose. - Both ways (A and B) will bring you to the page Create/Edit Burial Group.

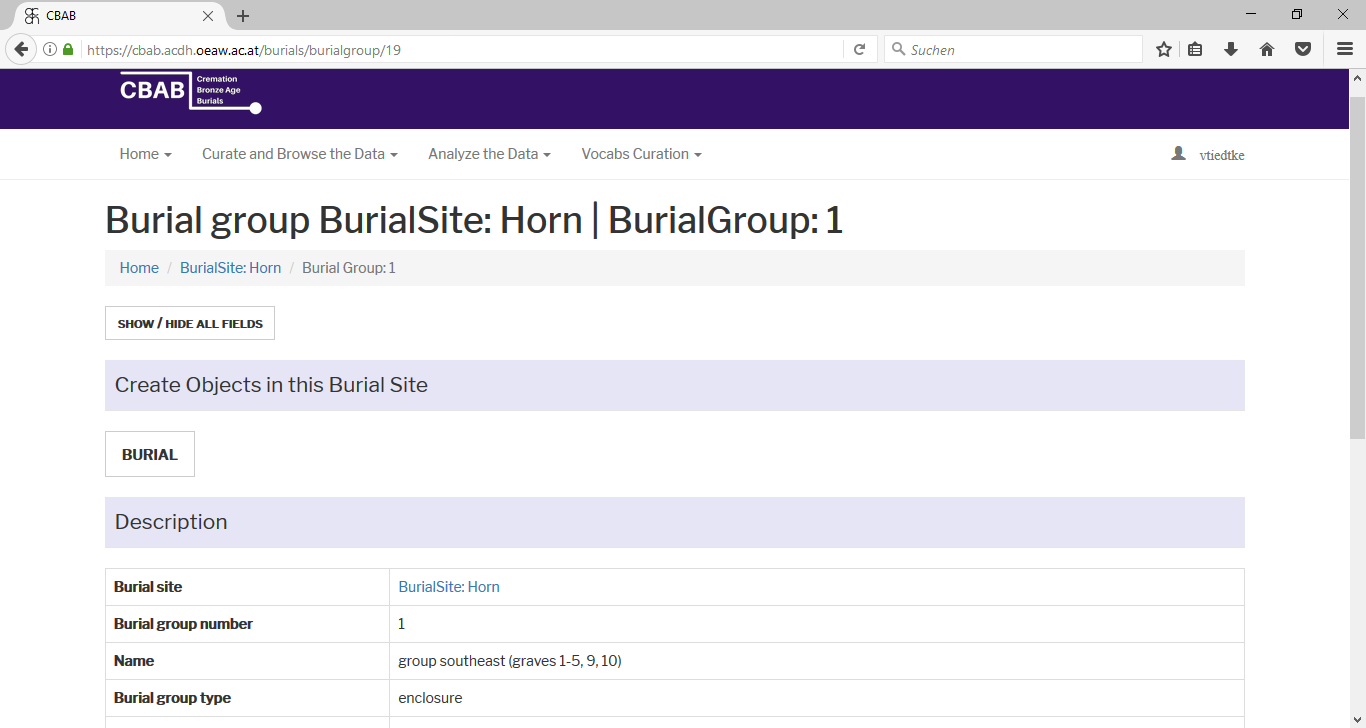
At the top of the Burial Site general page you find Create Objects in this Burial Site, where you have two buttons Burial Group and Burial. Click Burial Group and follow C).
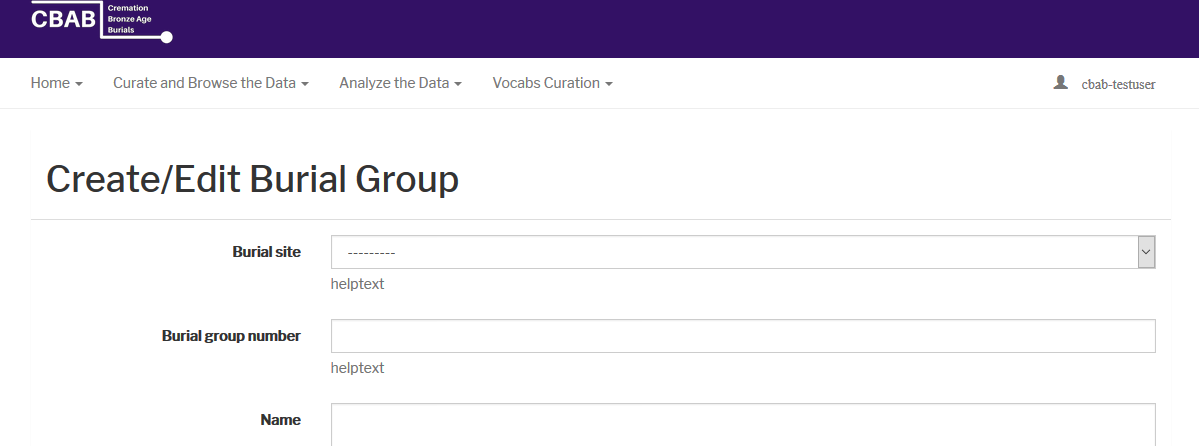
Fill out all of the boxes thoroughly and click Save.
Caution: If the Burial group is not separated from the rest of the
graveyard by an architectonic feature (e.g. grave hill, rock chamber or
enclosure) please describe it in the box Name.
By saving you will come to the general page on Burial Group/Burial Site. From there you can create burials by clicking the button Burial in Create Objects in this Burial Site on top of the page.
How to search for Burial Groups
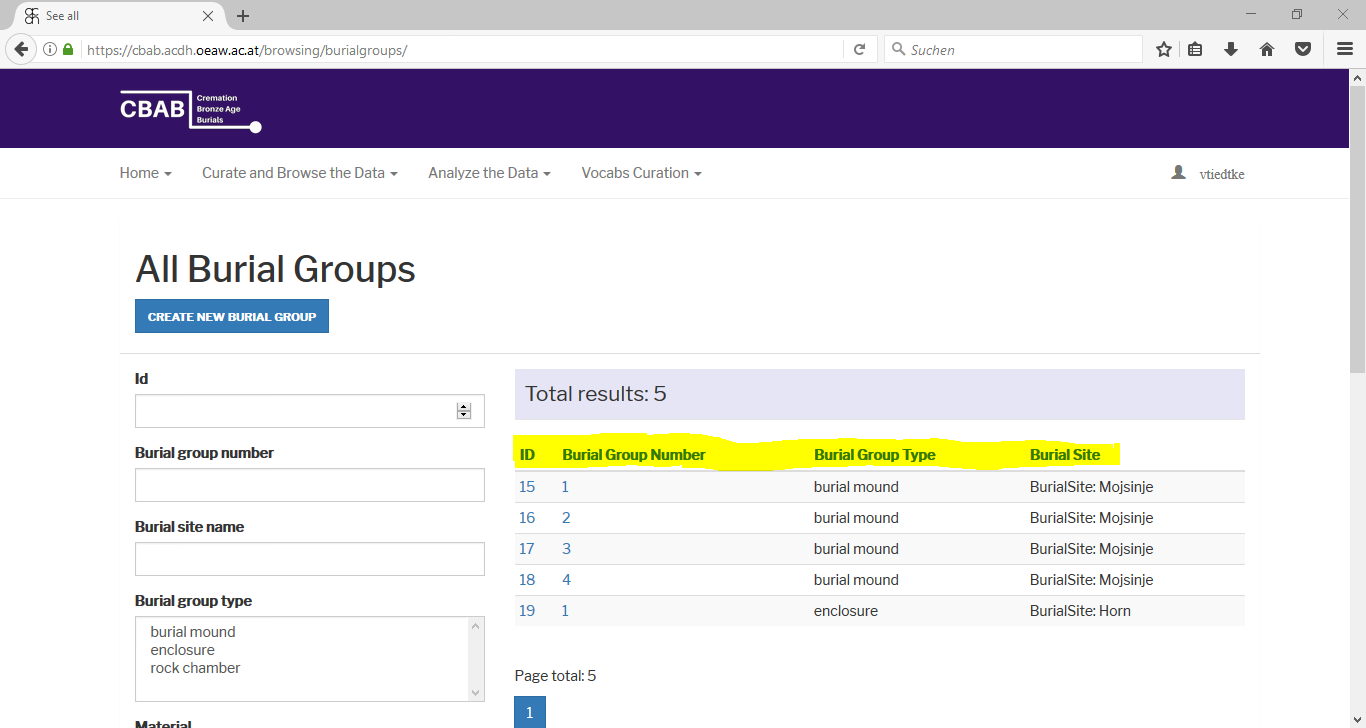
Click Curate and Browse the Data and choose Burial group. This will bring you to All Burial Groups with the list of all Burial Groups in the database (on the right of the screen). Click on the ID or Burial Group Number and you will see a general page with all the information regarding this specific burial group, including the list of all associated Burials.
If you look for burial groups with special properties:
You can choose every property concerning burial groups by filtering in boxes on the left of the page (Burial group type, Material etc.). Pick the things you are interested in (e.g. Burial site in Burial group type and soil/stone in Material) and click Search.
This will give you a list of all the burial groups featuring the properties you picked. From there you can go to the burial groups by clicking on the ID or Burial Group Number. This will again bring you to the general information page on this burial group.

How to create a Burial
There are two ways to create a Burial.
- Go to Curate and Browse the Data and choose Burial. Underneath the title All Burials you find the button Create New Burial. Follow C).
- Or you first go to the Burial Site you would like to create a Burial
in. You can find burial sites in All Burial Sites.
Clicking on the Name (e. g. Athens, Franzhausen-Kokoron) brings you to the general page on the Burial site you chose.
At the top of the general page you find Create Objects in this Burial Site, where you can click the button Burial.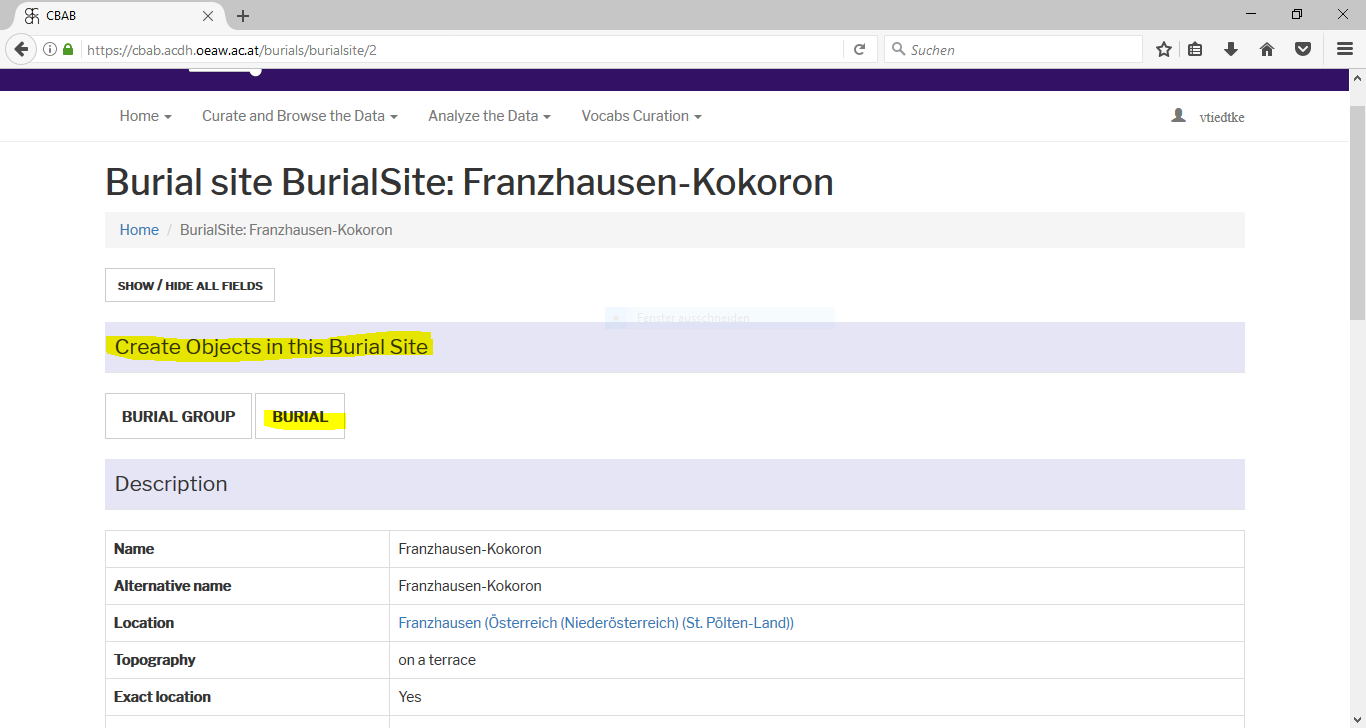
Both ways (A or B) bring you to the page Create/Edit Burial.
Try to fill out as many boxes as it is possible. Not all boxes are mandatory (e.g. Burial group is not mandatory, since not every grave belongs to one Burial group).

If there is a drop down list choose one option, except from the box Filling objects where you can put multiple terms.

There are several text boxes which allow you to express certain
properties of the grave more in detail. If the grave does not feature them just leave the
text boxes empty.
This concerns the following boxes:
- Displaced text
- Extraordinary burial text
- Inhumation burial type
- Bi-ritual burial type
- Post holes
- Surface identification marks
- Erdgraebchen and
- Other features
Click Save and you will be directed to the general overview on the Burial.
How to search for Burials
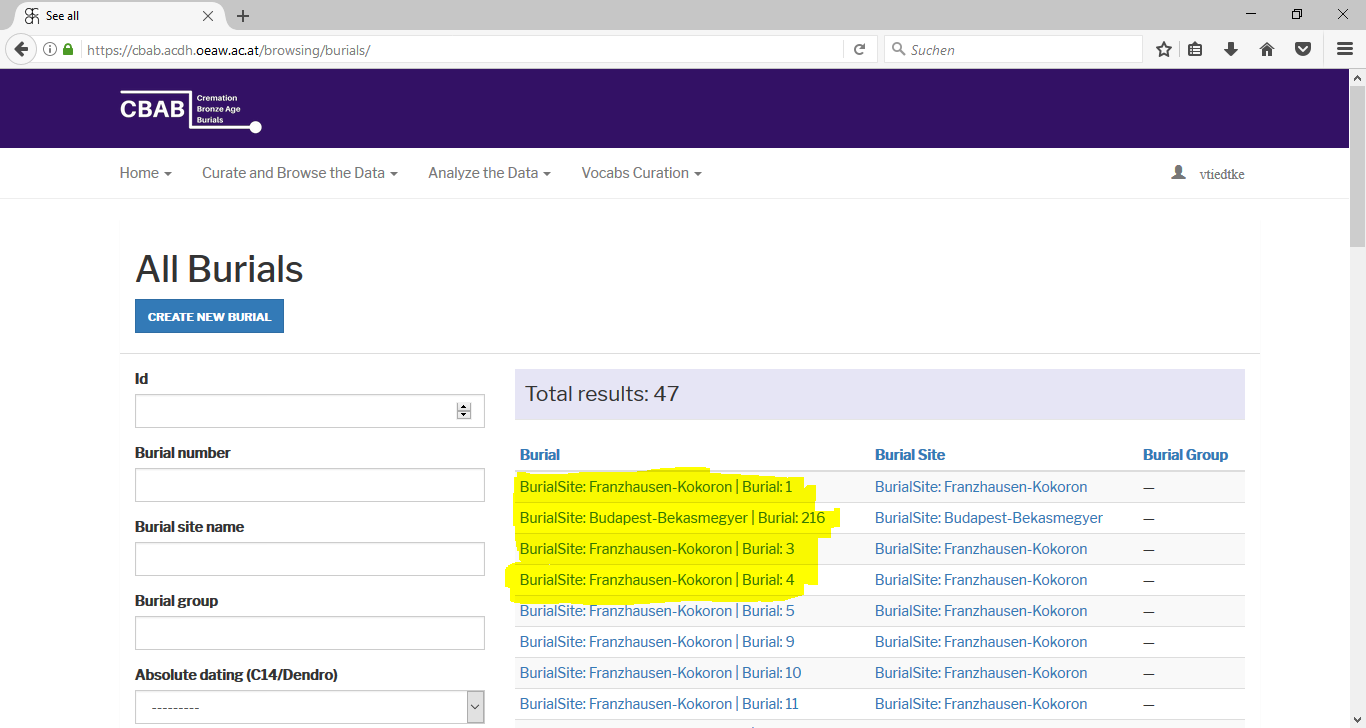
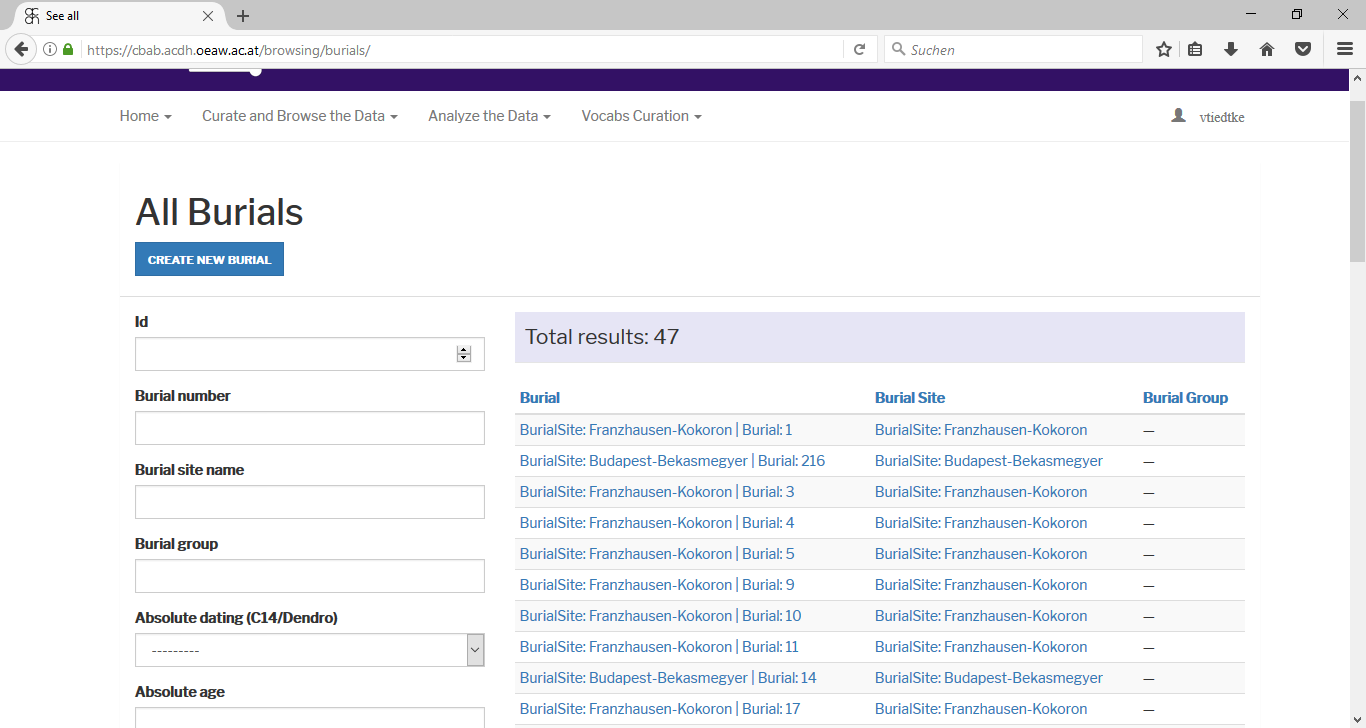
Click Curate and Browse the Data and choose Burials. This will bring you to All Burials with the list of all Burials in the database (on the right of the screen). Clicking on the one specific Burial from the list brings you general page with all the information on the burial.
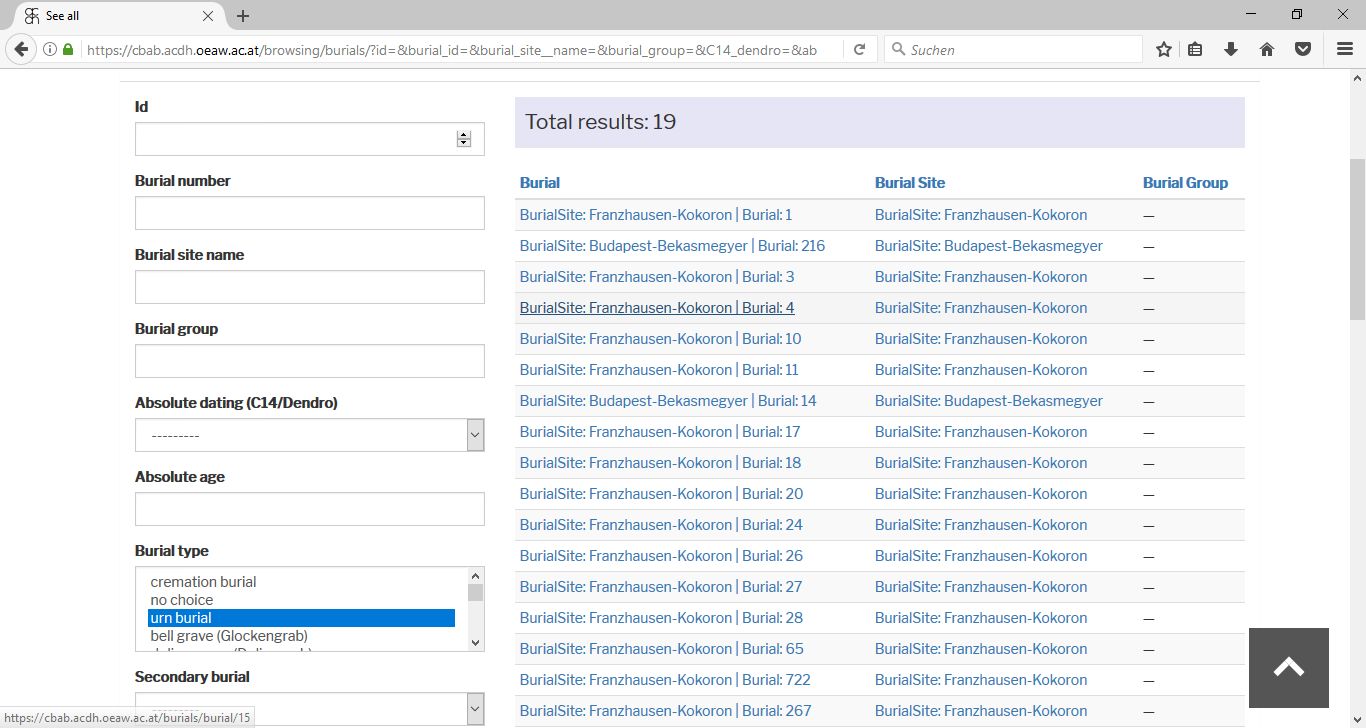
If you look for burials with special properties:
First go to Curate and Browse the Data and choose Burials.
This brings
you again to the All Burials page. You can choose every property concerning
burials in boxes by filtering on the left of the page.
Pick the things you are interested in (e.g. urn burial in Burial type and burial mound made of soil in Construction) and click Search.
This gives you a list of all the burials featuring the properties you picked. From there you can go to the different burials just by clicking on specific burial that you are interested in, which will bring you to the general information page on this burial.
How to Create an Urn
There are two different ways to create an Urn.
- First you have to create a burial (see above How to create a
Burial) and go to the general page on this specific burial.
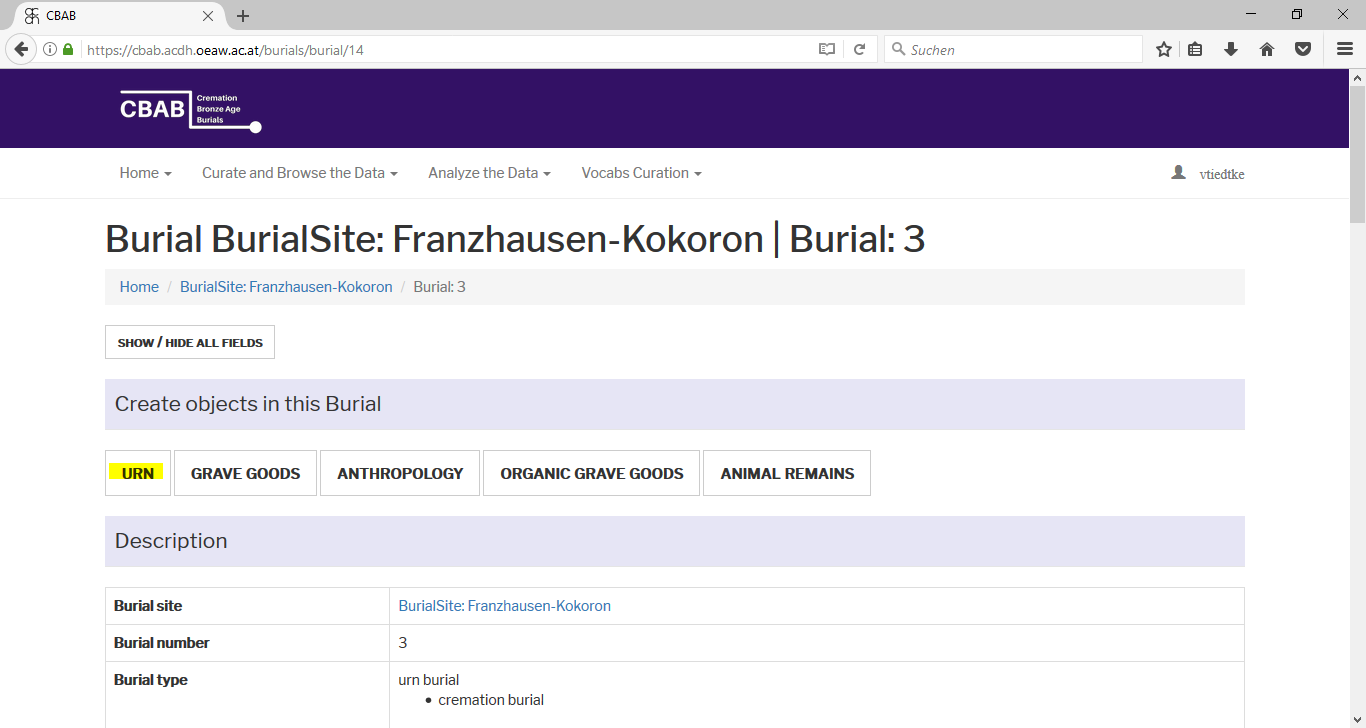
There is the category Create objects in this Burial where you choose the button Urn. Continue with C).
- Caution!
Using method B) means you have to pick the burial from the list provided in Burial on top of the page. The list features every burial in the database!
Go to Curate and Browse the Data and choose Urn.
It brings you to the page All Urns, where you can use the button Create New Urn.
- Fill out all the boxes using the Basic shape drop-down and your own words in
the text boxes. The Urn Inventory Number asks for the original inventory
number mentioned in the catalogue or excavation documentation. If you do not know
it, please mention it.

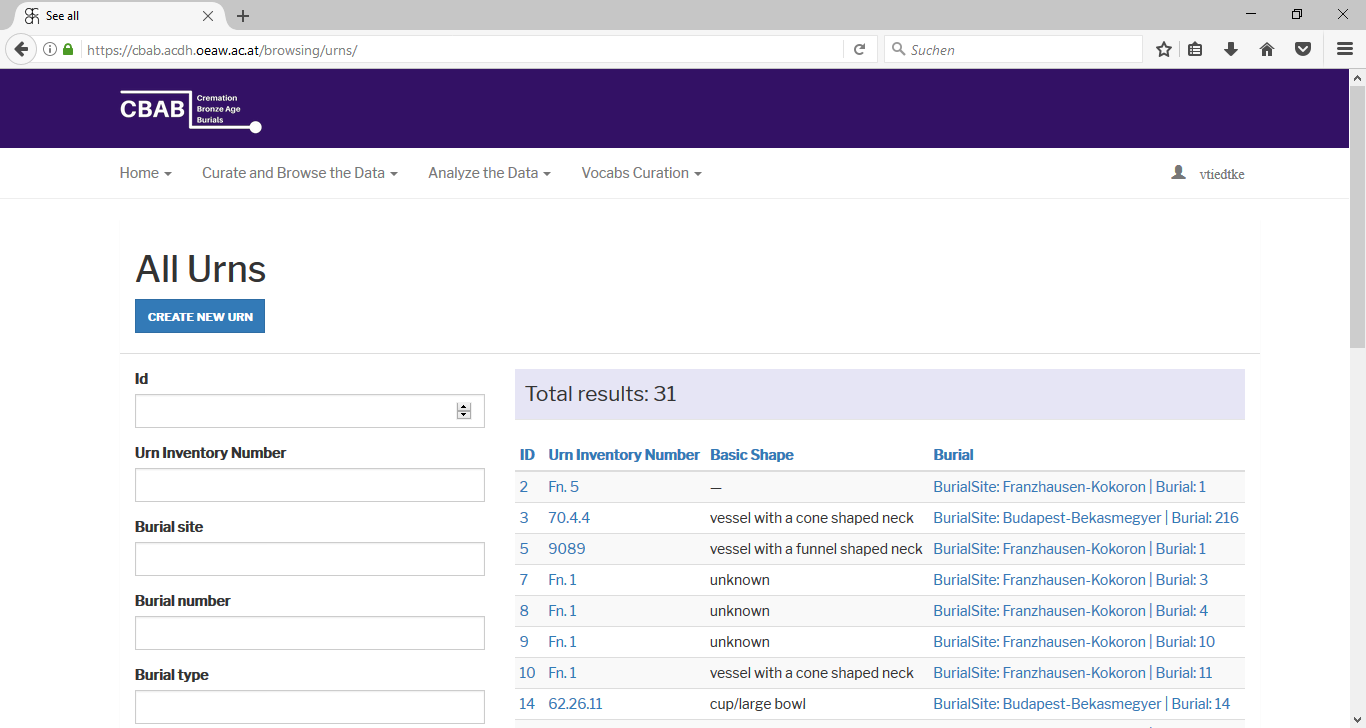
How to search for Urns
First click Curate and Browse the Data and choose Urns. This will bring you
to the All Urns with the list of all Urns in the database (on the right of the
screen).
You can find urns and check their properties (Urn type, Objects in the
urn) by clicking on the ID or Urn Inventory Number. This brings you to a
general page with all the information on the urn vessel. If you click on one of the
Burials from the list on the right you will get all general information
regarding this specific burial.
If you look for urns with special properties:
First go to Curate and Browse the Data and choose Urns. This brings you
again to the All Urns. You can choose every property concerning urns in boxes by
filtering in the left of the page.
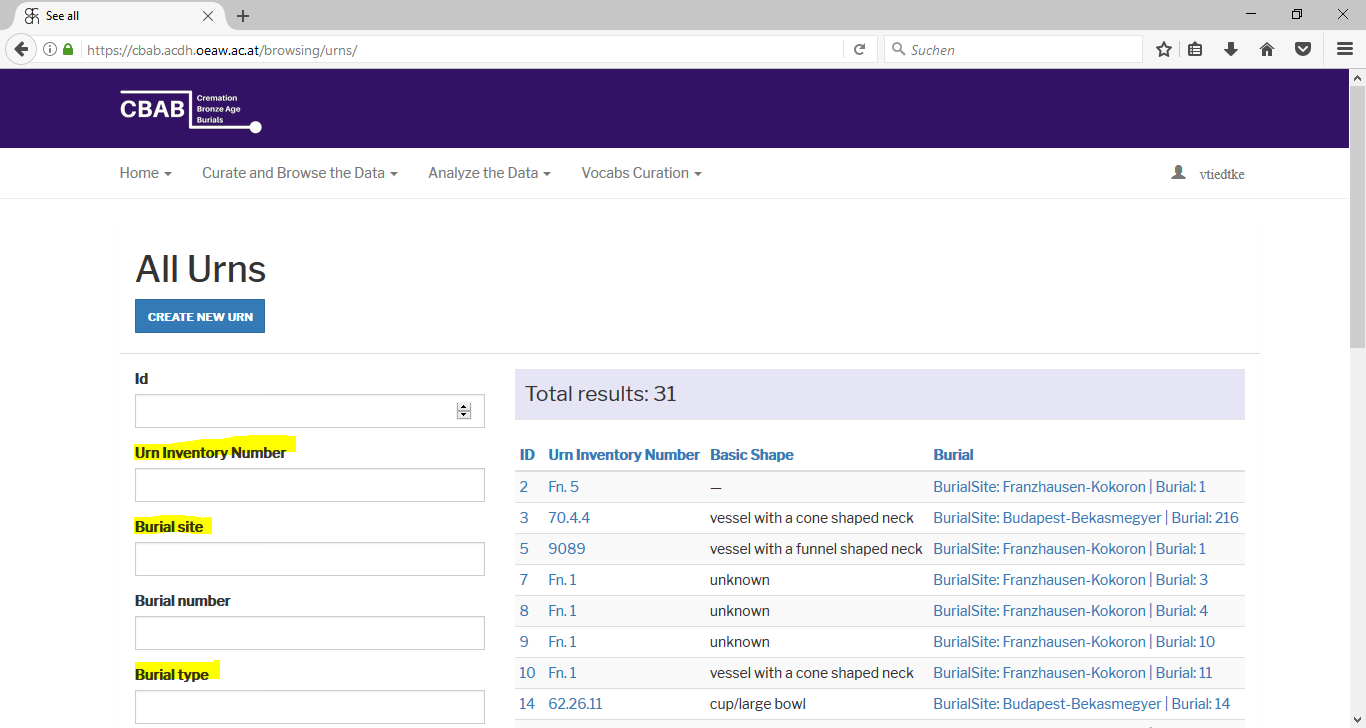
Pick the things you are interested in (e.g. vessel with a cone shaped neck in Basic shape) or write the terms you are interested in in the text boxes (e.g. Variation contains). Click Search. This gives you a list of all the urns featuring the properties you picked. From there you can go to the specific Urn by clicking ID or Urn Inventory Number. Clicking on the name of the Burial (under Burial) will bring you to the general information page on this burial.
How to Create an Urn cover
There are two different ways to create an Urn cover.
- First you have to create an urn (see above) and click Urn Cover yes
- Caution! Using method B) means you have to pick one Urn from the list. The
list features every urn in all burials in the database!
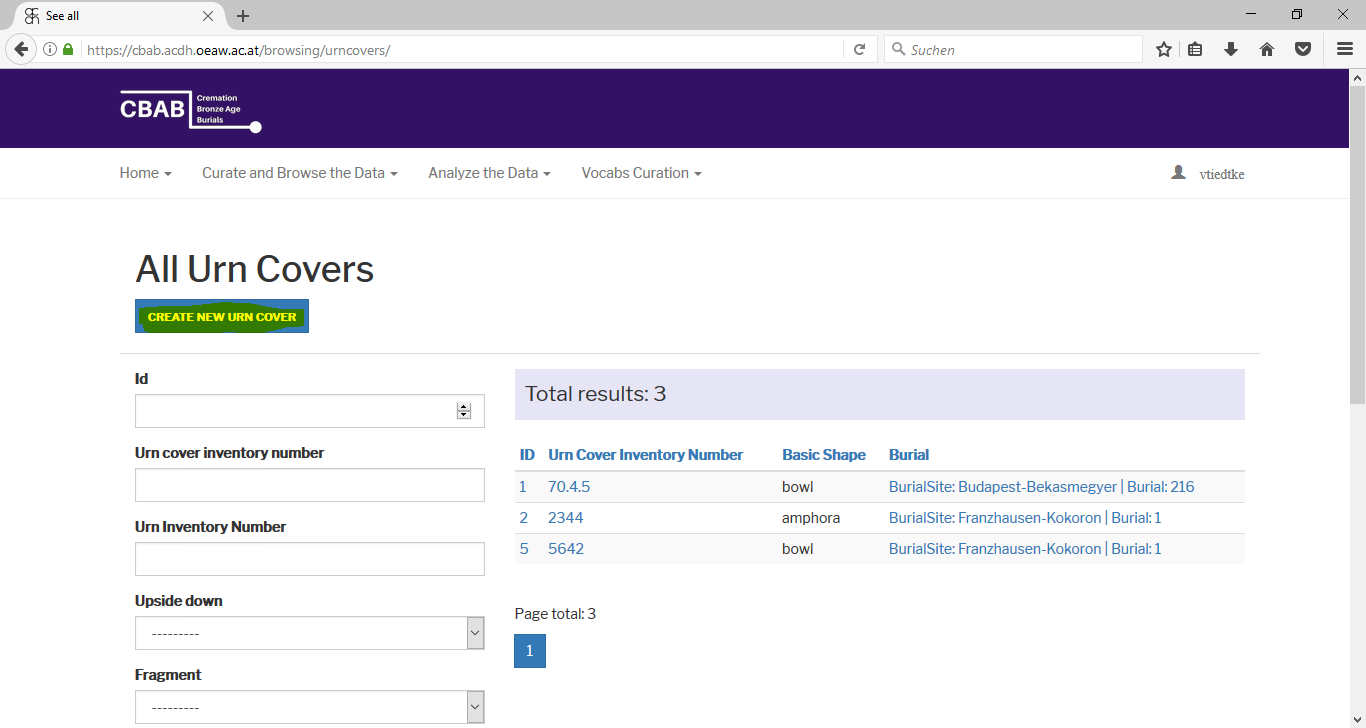
Go to Curate and Browse the Data and choose Urn Cover. It brings you to the page All Urn Covers, where you can use the button Create New Urn Cover. - Fill out all the boxes using the Basic shape drop-down and your own words in the text boxes. The Urn cover Inventory Number is the original inventory number mentioned in the catalogue or excavation documentation. If you do not know it, please enter Unknown.

Then go to the general page on this specific urn burial. In the category Create objects in this Burial you choose the button Urn Cover. Continue with C).
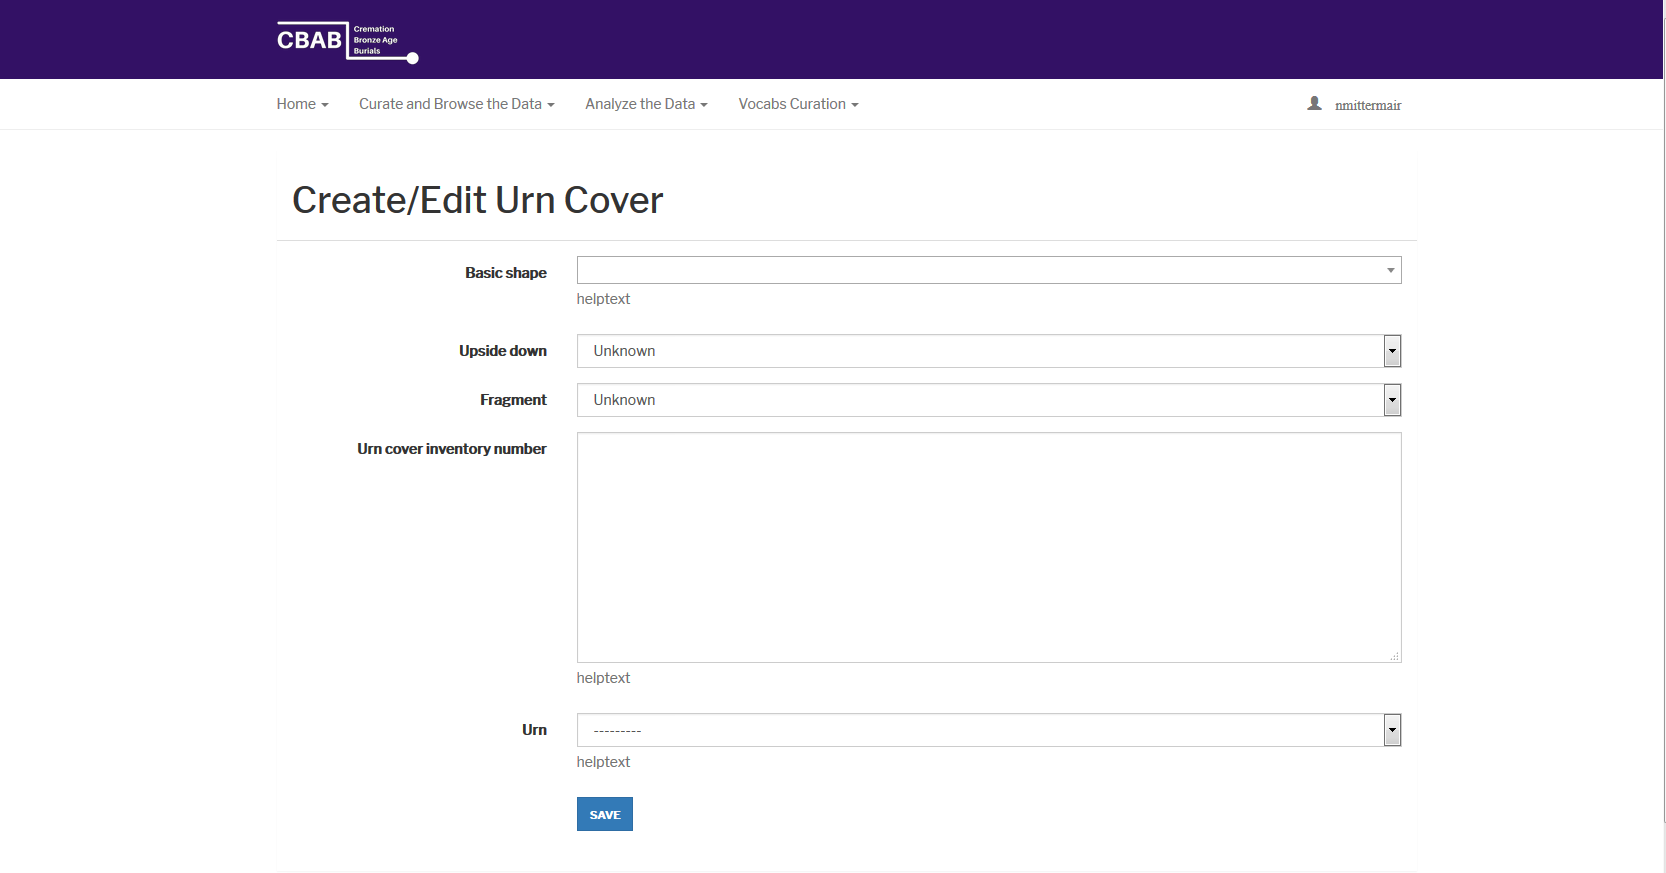
This will bring you to the sheet Create/Edit Urn Cover. The first field is
Urn. Here you must choose a specific Urn from the drop down list that
correlates with the Urn cover you are entering!
After that you can proceed with the Urn cover properties (Basic shape, Upside Down,
Fragment, Inventory number). SAVE
How to search for Urn covers
First click Curate and Browse the Data and choose Urn cover. This will
bring you to All Urn Covers with the list of all Urn covers in the database (on
the right of the screen).
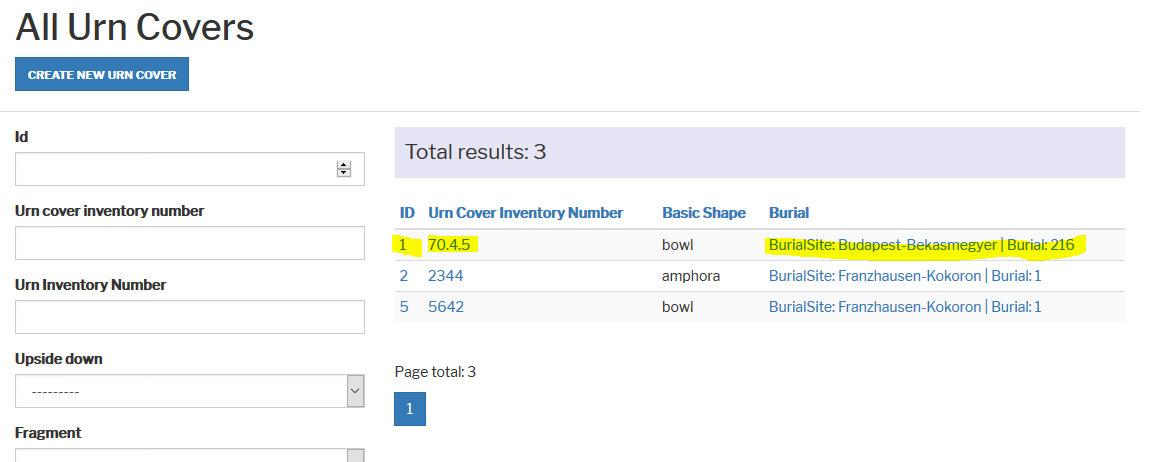
You can find urn covers and check their properties by clicking on the ID or Urn
cover Inventory Number. This brings you to a page with all the information on
the specific urn cover that. If you click on one of the Burials from the list on
the right you will get all general information regarding this specific burial.
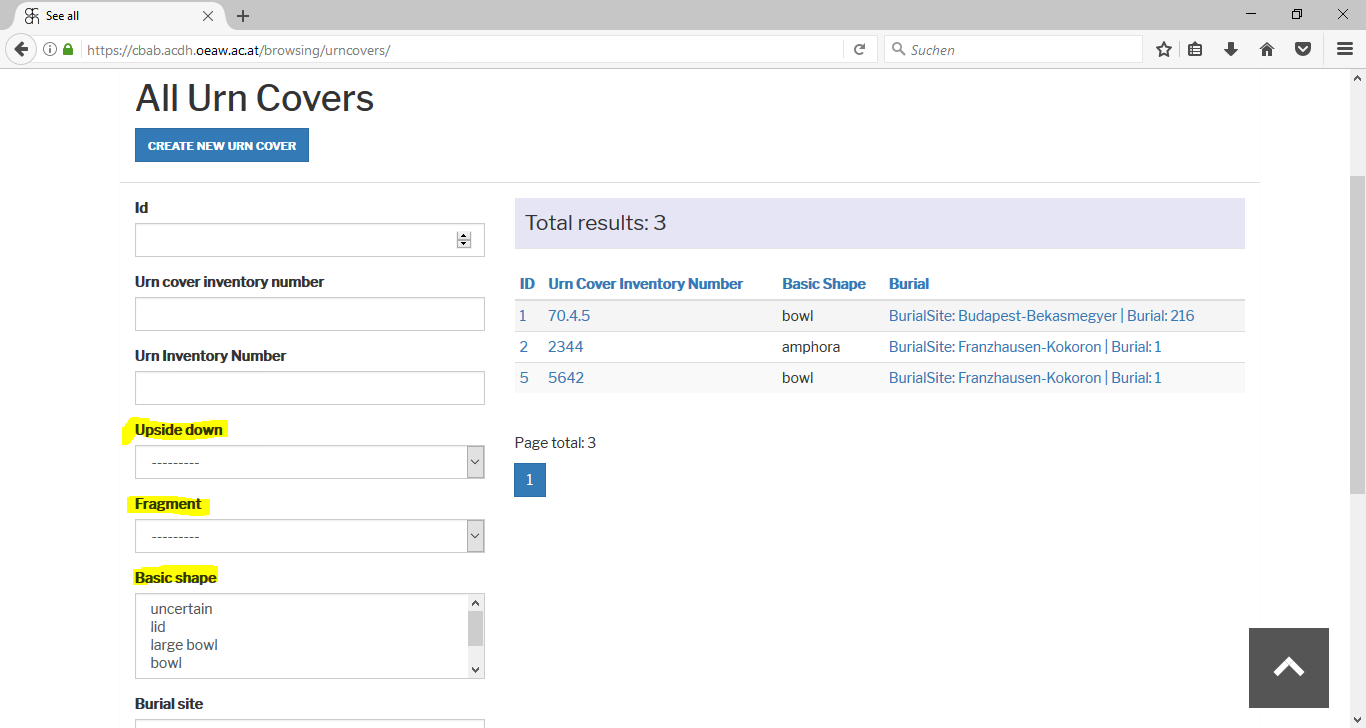
If you look for urn covers with special properties:
First go to Curate and Browse the Data and choose Urn cover. This brings
you again to the All Urn covers page. You can choose every property concerning
urn covers in boxes by filtering in the left of the page. Pick the things you are
interested in (e.g. lid in Basic shape and Yes in Upside
down). Click Search.
This gives you a list of all the urn covers featuring the properties you picked. From there you can go to the specific Urn cover by clicking ID or Urn Inventory Number. Clicking on the name of the Burial (under Burial) will bring you to the general information page on this burial.
How to Create a Grave Good
Important to know:
You can just add one type of grave good in each
entry.
Example: You do have a grave with a knife, two vase-headed pins and an accessory vessel.
You will then have to enter grave good three times: one entry for the knife, one
entry for the two vase-headed pins and one entry for the accessory vessel.
Caution: If you have a grave with two pins both vase-headed but different variations, you will have to make two different grave good entries.
There are two different ways to create Grave Good.
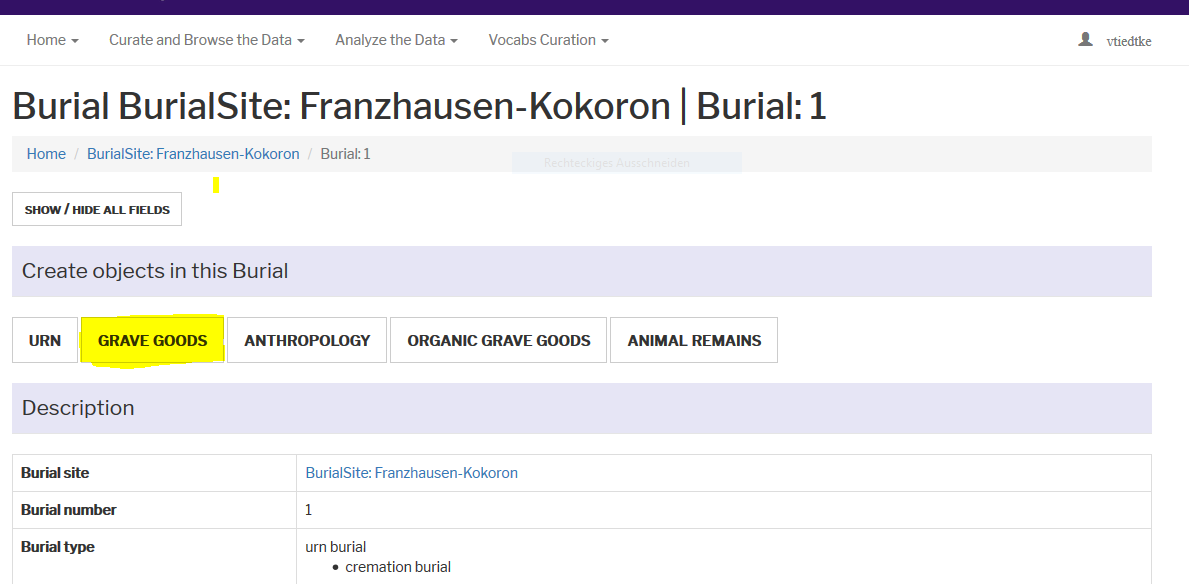
- First you have to create a burial (see above How to create a
Burial).
On the general page of the burial there is the category Create objects in this Burial where you choose the button Grave Good (continue with C). Since this is the easier way, we highly recommend using this method! By following it you cannot mix up the burials. - Caution: Using method B) means you have to pick the burial and urn from the list. The list features every burial and every urn in the database!
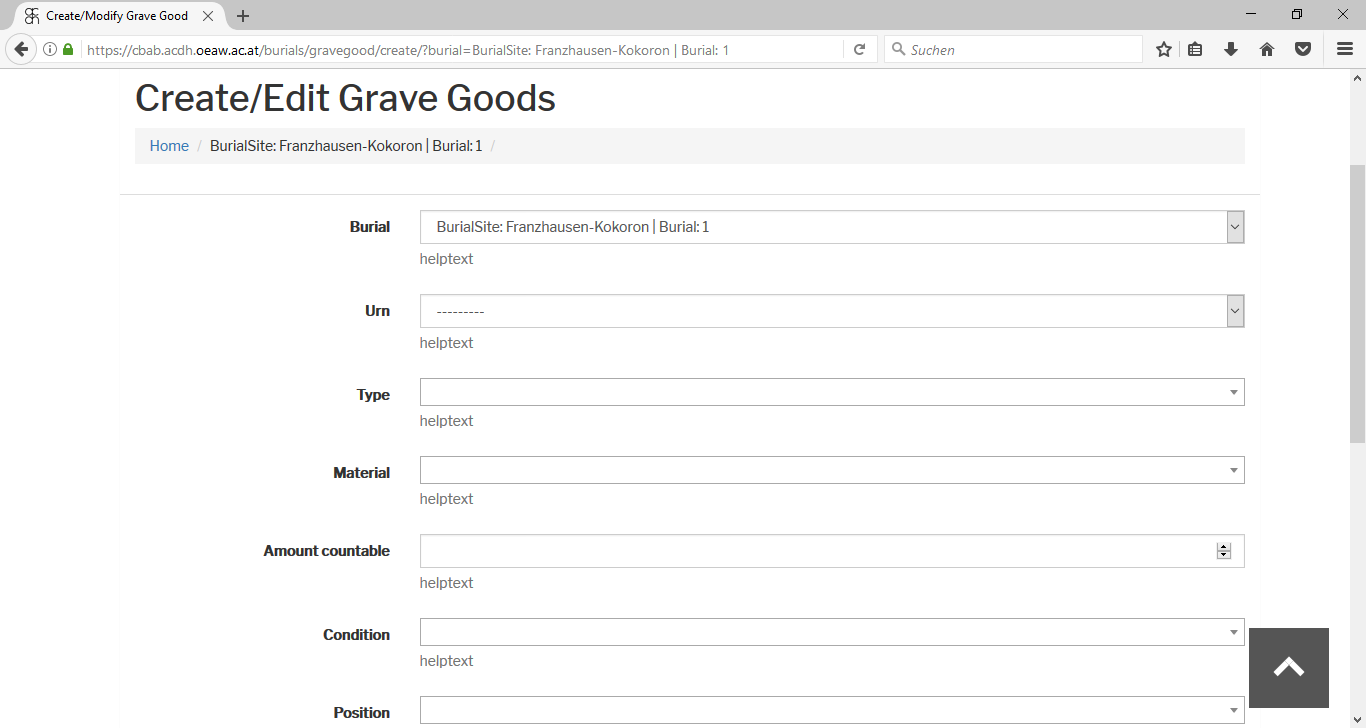
- Create/Edit Burial. Fill out all the boxes mainly using the drop-down-lists.
Amount means just the total amount of the specific grave good you are entering in this moment and not the total number of all Grave Goods.
In the text box Comment you can add important details (e.g. the inventory number mentioned in the catalogue/excavation documentation or the type variation in the original language “Vasenkopfnadel Typ Velatiće”). SAVE - There is a short cut, if you enter more than just one grave good. After Saving the first Grave good you will see the Description of the Grave Good that you just entered. On the bottom of this page you will find the button Create New Grave Goods in This Burial. Click the button and start entering the next grave good.
Go to Curate and Browse the Data and choose Grave good. It brings you
to the page All Grave Goods, where you can use the button Create New Grave
Goods. This will bring you to sheet Create/Edit Grave Goods.
First two fields are Burial and Urn. Here you must choose a specific
Burial/Urn which correlates to the Grave good you are entering!
After that you
can proceed with the Grave Good properties (Type, Material, etc.). SAVE

How to search for a Grave Good
The variety and number of Grave Goods can be overwhelming if you just look for something unspecific. If you want to browse the grave good data with no closer result in mind, there are two ways:
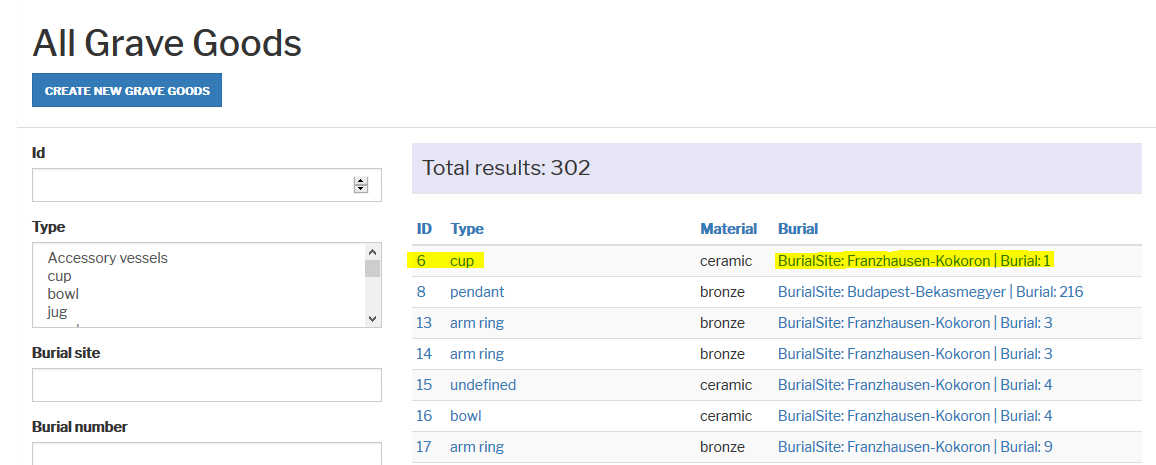
First click Curate and Browse the Data and choose Grave Goods. This will bring you to All Grave Goods with the list of all Grave Goods in the database (on the right side of the screen). You can find Grave Goods and look at their properties by clicking on ID or Type in the list. This brings you to a page with all the information on the specific Grave Good. If you click on one of the Burials from the list on the right you will get all general information regarding this specific burial.
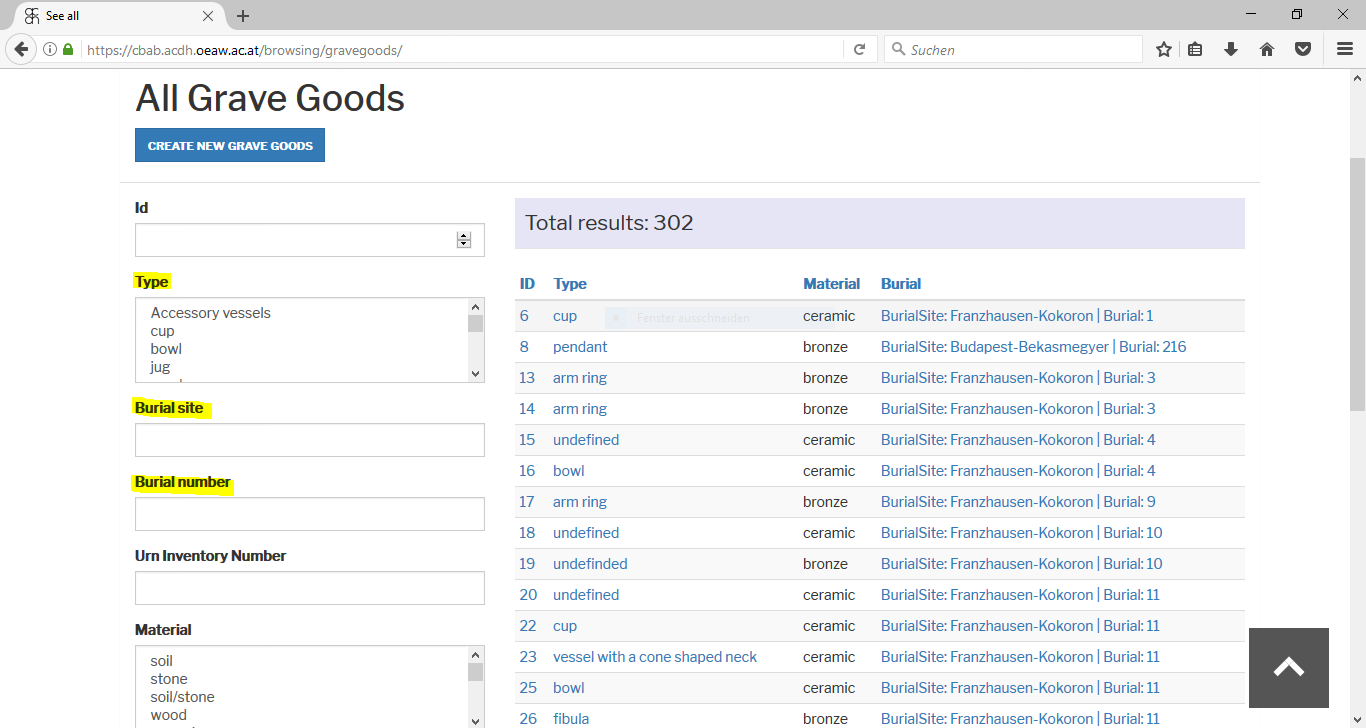
If you look for specific grave goods or grave goods with special properties:
First go to Curate and Browse the Data and choose Grave Goods.
This brings you to the All Grave Goods page. You can choose every property
concerning burials in boxes by filtering in the left of the page.
Pick the things you are interested in (eg. urn burial in Burial type and
burial mound made of soil in Construction) and click
Search.
This gives you a list of all the grave goods featuring properties
you picked. From there you can go to the specific Grave Good by clicking ID or
Type. Clicking on the name of the Burial (under Burial) will bring you
to the general information page on this burial.
How to enter anthropological results in CBAB
Important to know:
You can just add one deceased of the burial in each
entry.
Example: You have a grave with an adult man and an Infans 1. You will then have to make two different entries in Anthropology for each person.
There are two different ways to create an Anthropology result.
- First you have to create a burial (see above How to create a
Burial).
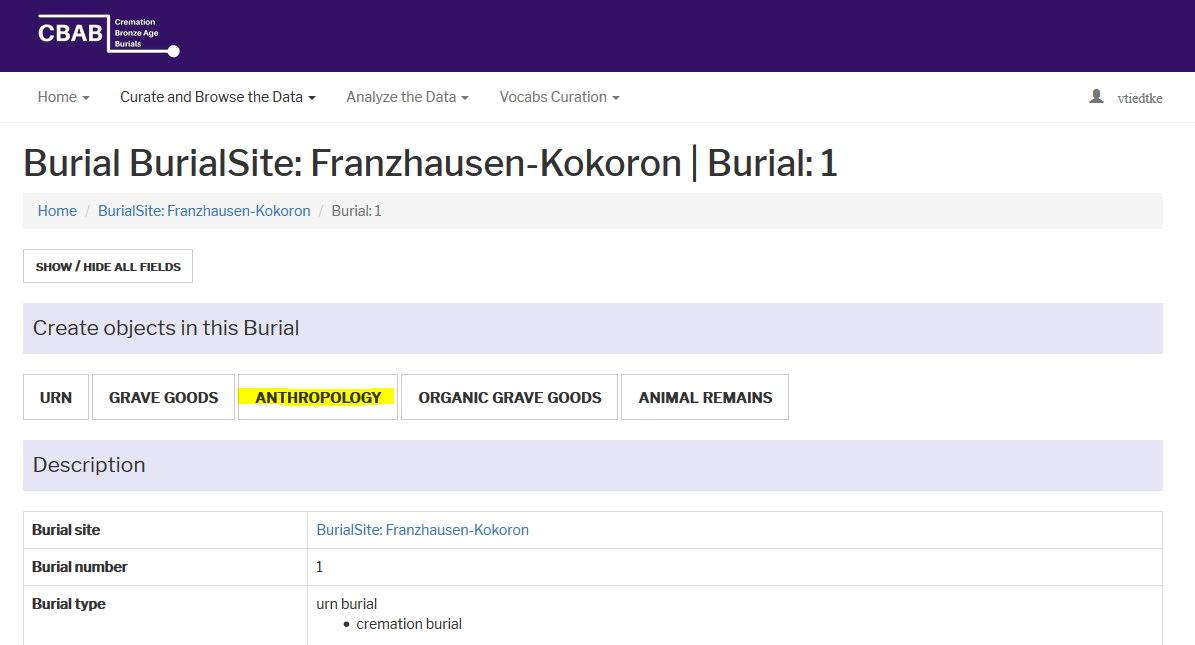
On the general page of the burial there is the category Create objects in this Burial where you choose the button Anthropology (continue with C). Since this is the easier way, we highly recommend using this method! By following it you cannot mix up the burials. - Caution! Using method B) means you have to pick the burial and urn from the list. The list features every burial and every urn in the database!
- Create/Edit Anthropology. Fill out all the boxes mainly using the drop-down-lists and adding information from the anthropological report.
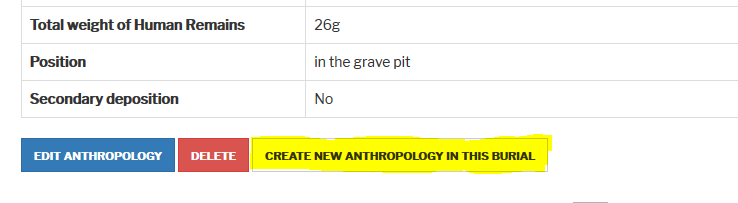
- There is a short cut, if you enter more than just one person. After Saving the first Anthropology (first person) you will see the Description of the Anthropology that you just entered. On the bottom of this page you will find the button Create New Anthropology in This Burial. Click the button and start entering the next human remains.
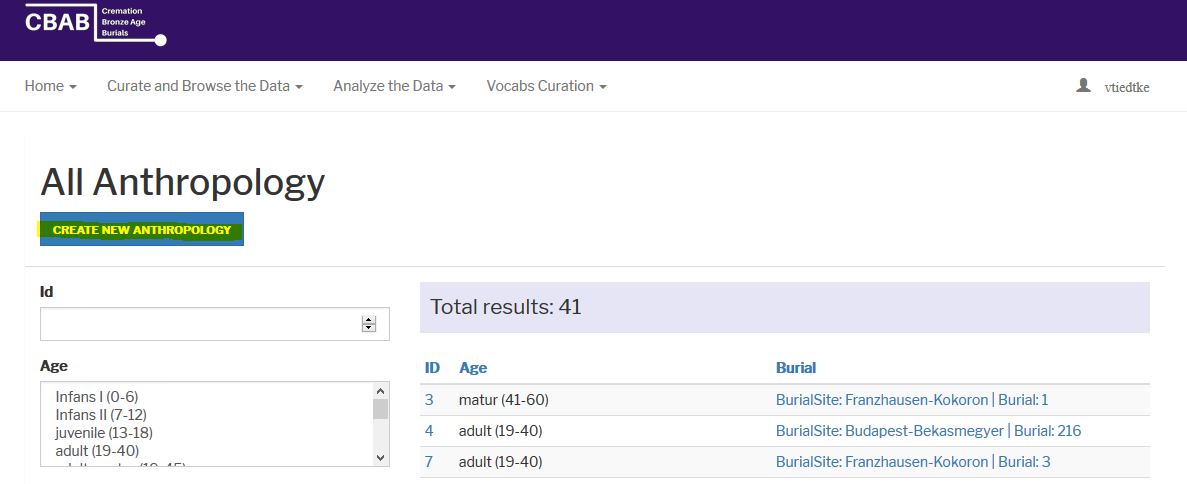
Go to Curate and Browse the Data and choose Anthropology. It brings you
to the page All Anthropology where you can use the button Create New
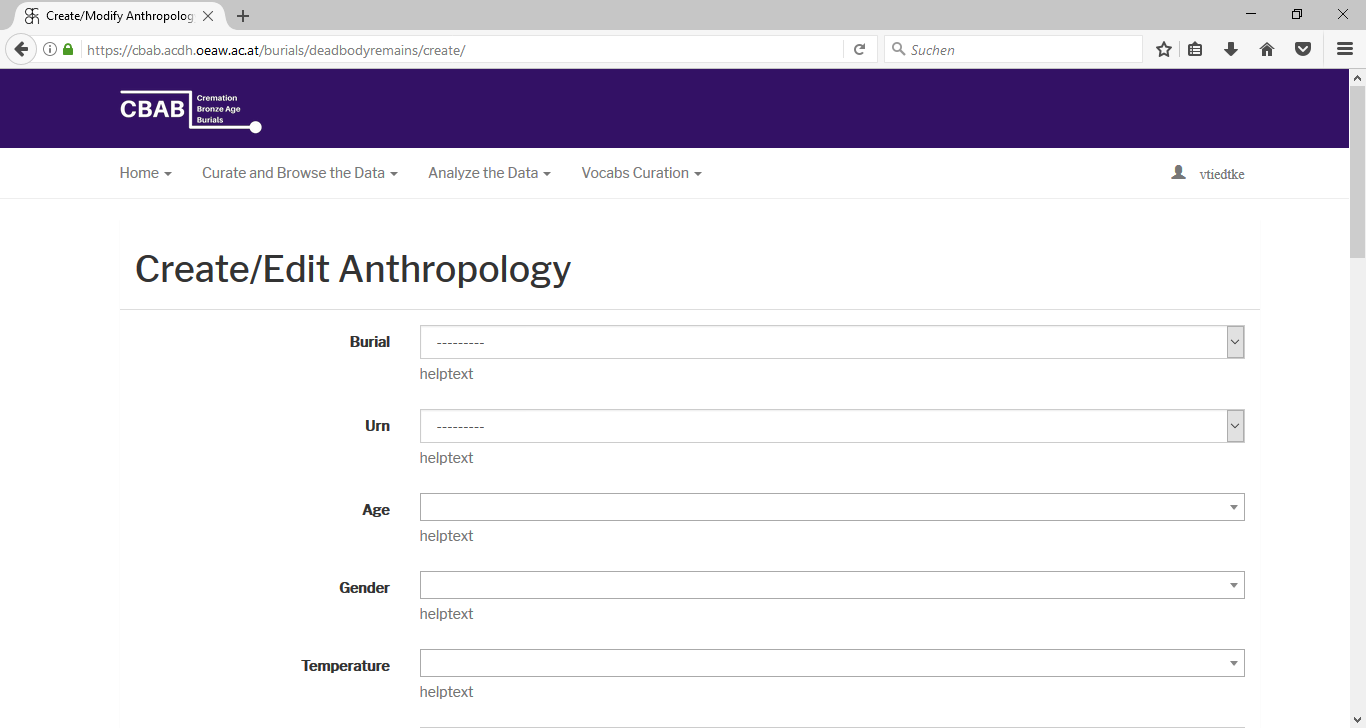
Anthropology. This will bring you to sheet Create/Edit Anthropology.
First two fields are Burial and Urn. Here you must choose a specific
Burial/Urn which correlates to the Anthropology you are entering!
After that you
can proceed with the Anthropology properties (Age, Gender etc.). SAVE
Weight means just the weight of the person you are entering in this moment and
not the total amount of all human remains (= Total weight of Human
Remains).
In the text box Comment you can add important details (e.g.
the inventory number mentioned in the catalogue/excavation documentation or grave
good objects being found among the cremated human remains).
How to browse or search for anthropological results
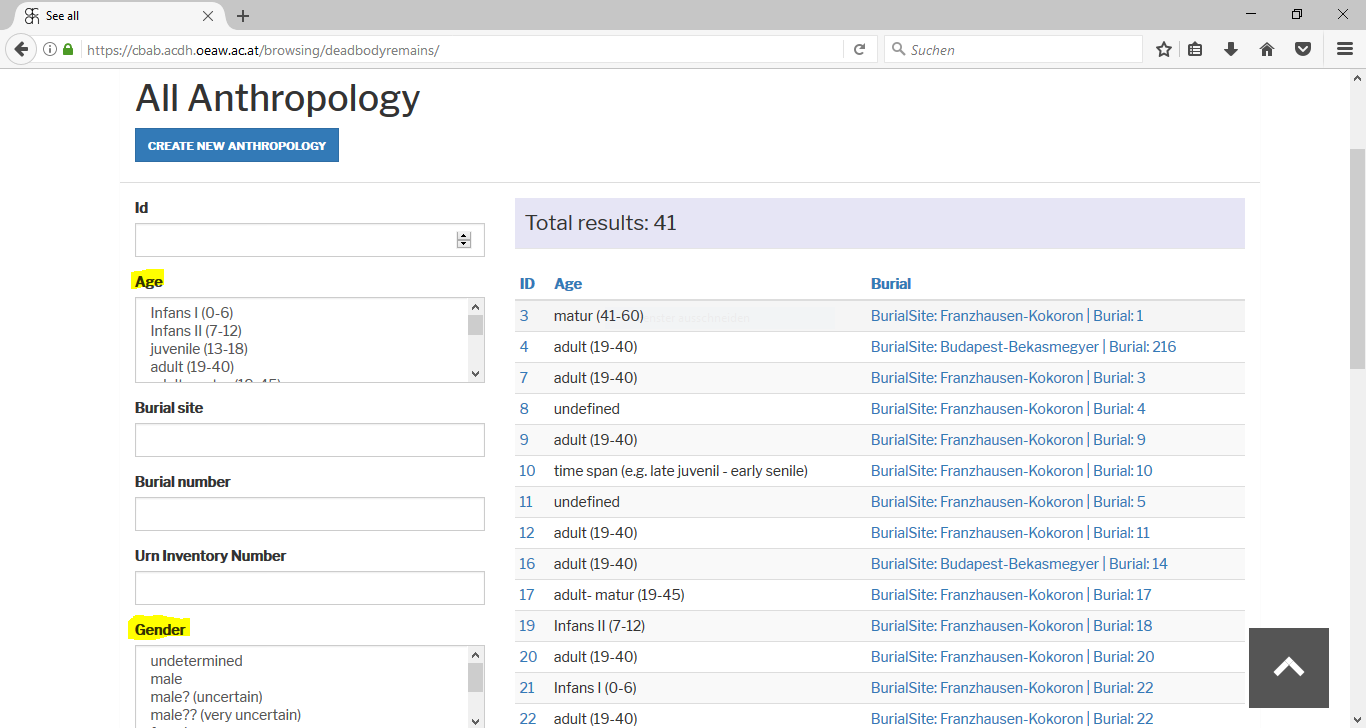
First click Curate and Browse the Data and choose Anthropology. This brings you to the All Anthropology with the list of all Anthropologies in database (on the right side of the screen). By clicking on the ID you will see Description of the specific Anthropology with all properties (Age, Gender etc.). Clicking on the one of the Burials from the list Burial, you will get all general information regarding this specific burial.

If you look for specific age groups or persons with special properties:
First
go to Curate and Browse the Data and choose Anthropology. This brings you
to the All Anthropology page. You can choose every property (Age, Gender etc.)
concerning Anthropology in boxes.
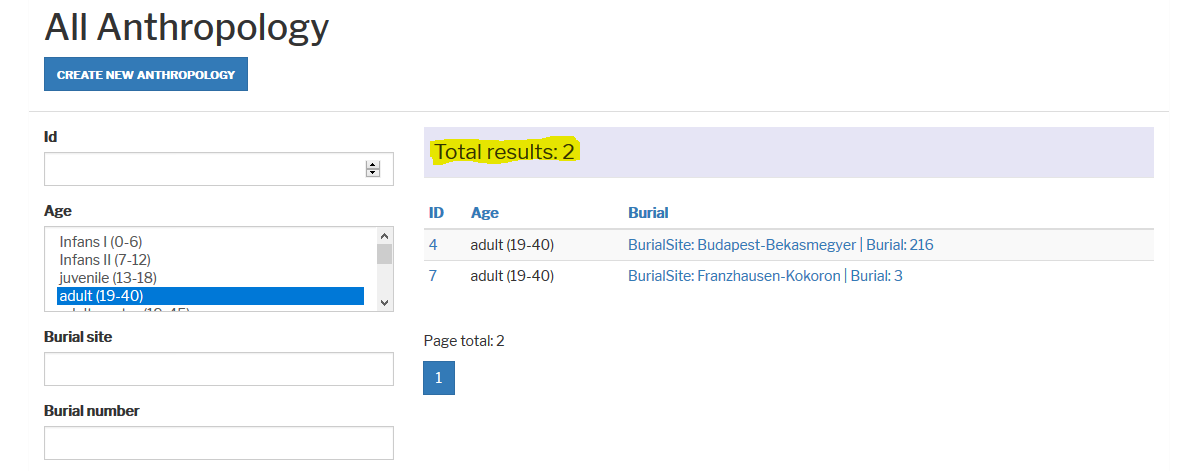
Pick the things you are interested in (eg.
Infans 1 (0-6) in Age and I (200-300 Celsius) in Temperature).
Click Search.
This gives you a list of all the burials featuring the properties you picked. From there you can go to the specific Anthropology by clicking ID. Clicking on the name of the Burial (under Burial) will bring you to the general information page on this burial.
How to create Organic Grave Goods
There are two different ways to create an Organic Grave Good.
- First you have to create a burial (see above How to create a Burial).
- Caution! Using method B) means you have first to pick the burial and urn from the list provided in Burial and Urn on top of the page. The list features every burial and every urn in the database!
- Create/Edit Organic Grave Goods. Fill out all the boxes using the drop-down-lists and adding information from the biological report.
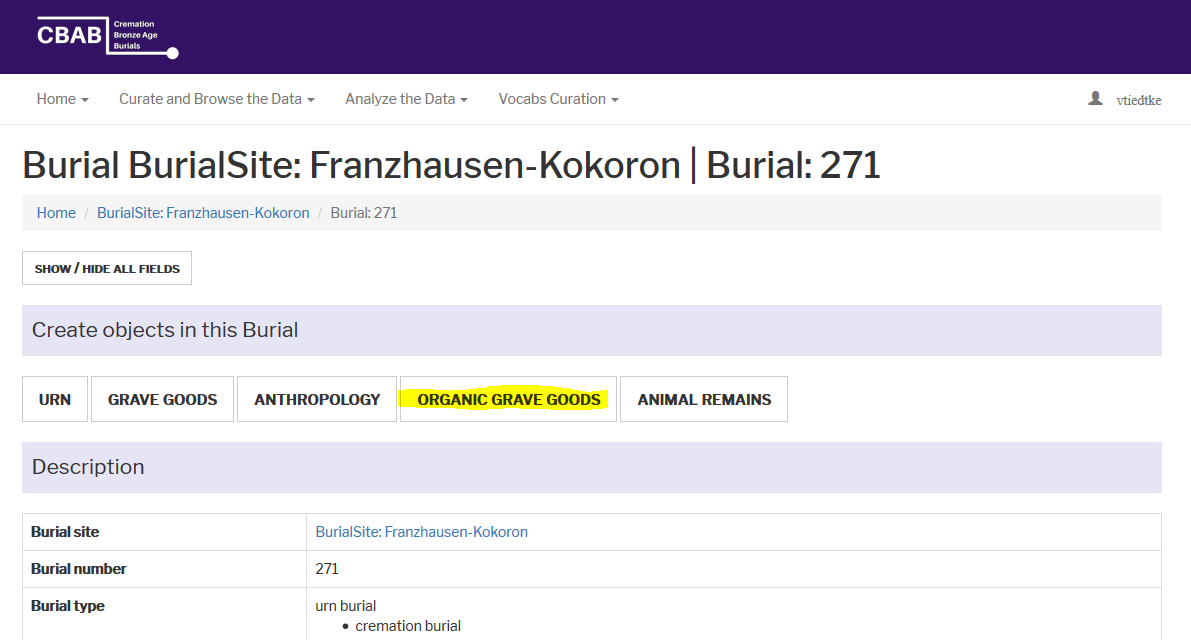
On the general page of the burial there is the category Create objects in this Burial where you choose the button Organic Grave Goods (continue with C). Since this is the easier way, we highly recommend using this method! By following it you cannot mix up the burials.
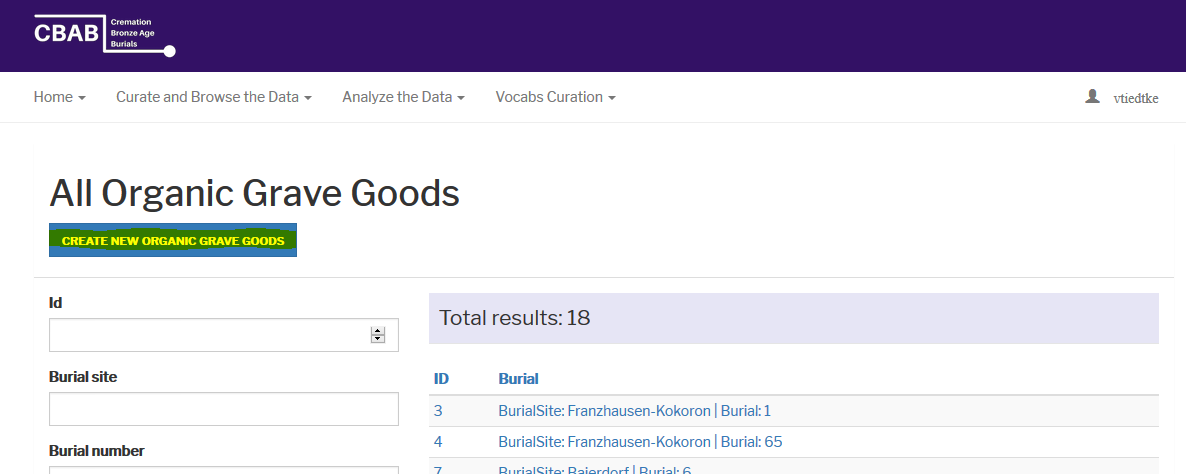
Go to Curate and Browse the Data and choose Organic Grave
Good.
It brings you to the page All Organic Grave Goods, where
you can use the button Create New Organic Grave Goods.
You will be directed to Create/Edit Organic Grave Good. First two fields
are Burial and Urn. Here you must choose a specific Burial/Urn
which correlates to the Organic Grave Goods you are entering!
After that you
can proceed with the Organic Grave Goods properties (Food etc.).
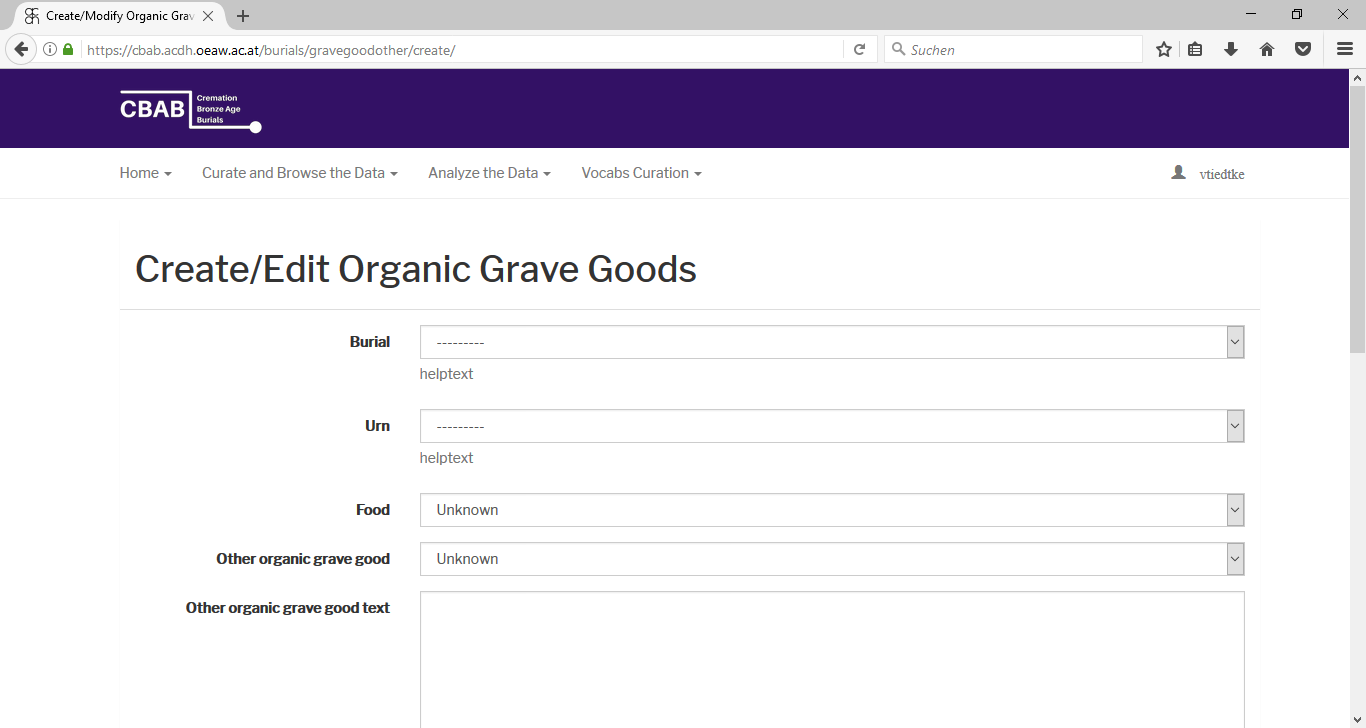
Especially Other organic grave good text gives you space to describe it in detail, while the text box Comment is for adding important details (e.g. the inventory number mentioned in the catalogue/excavation documentation or grave good objects/ human remains being found together with).
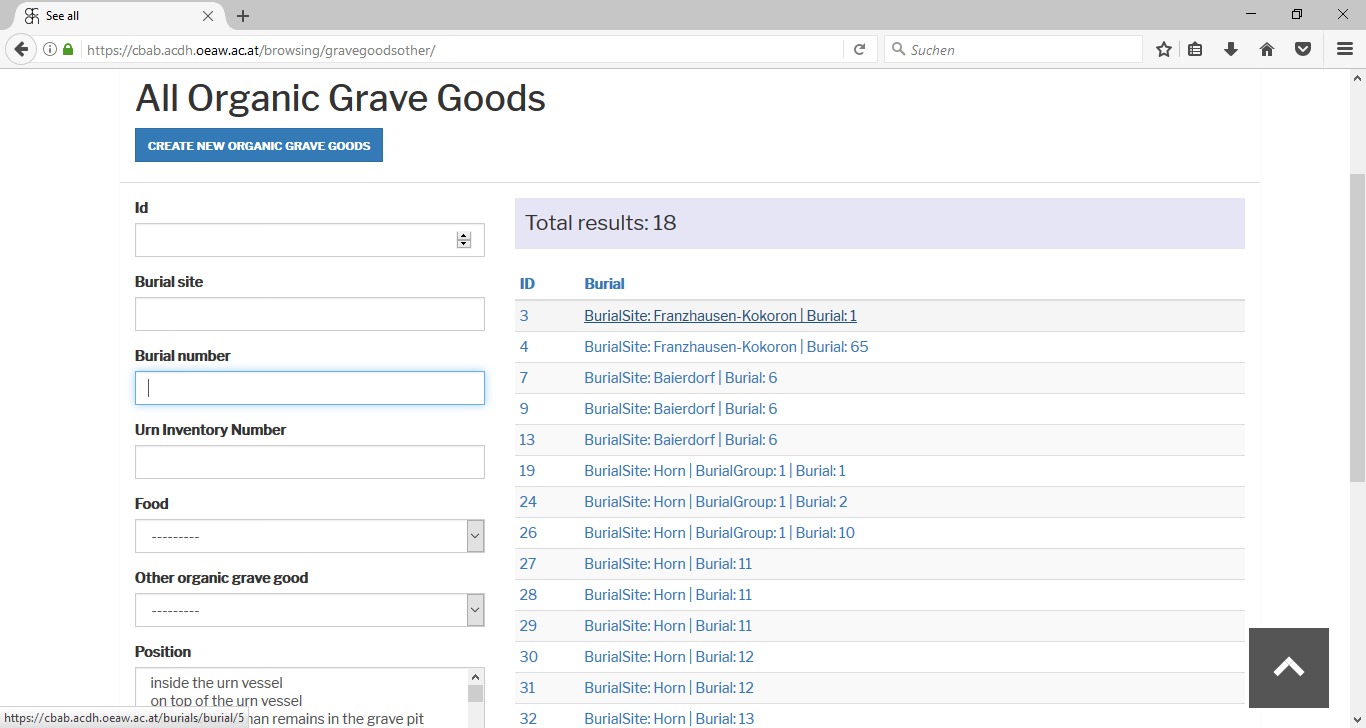
How to browse or search for Organic Grave Goods
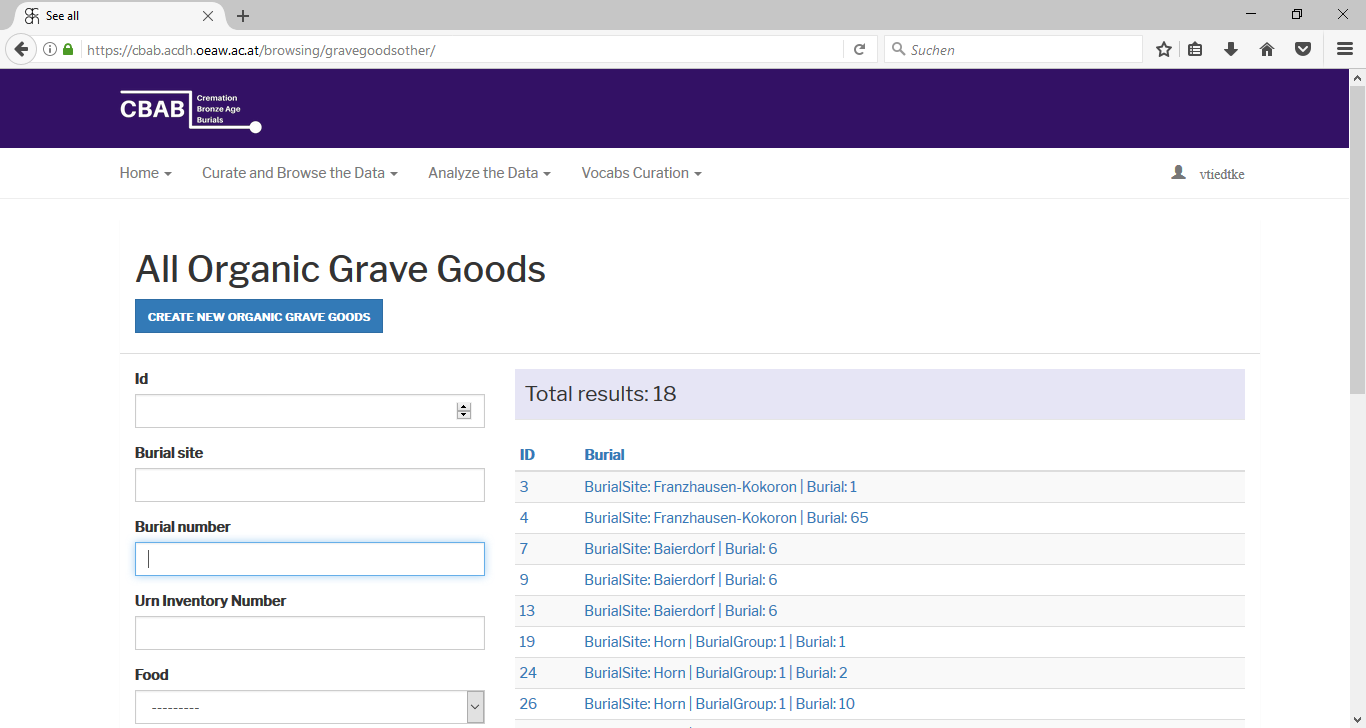
First click Curate and Browse the Data and choose Organic Grave
Goods.
This brings you to the All Organic Grave Goods with the list
of all Organic Grave Goods in database (on the right side of the screen). By
clicking on the ID you will see Description of the specific Organic
Grave Goods with all properties (Food etc.). Clicking on one of the
Burials from the list Burial, you will get all general information
regarding this specific burial.
If you look for specific Organic Grave Good:
First go to Curate and
Browse the Data and choose Organic Grave Goods. This brings you again
to the All Organic Grave Goods page. You can choose from just a few
properties concerning the corresponding burials in boxes by filtering in the left of
the page.
Pick the drop-down options you are interested in (eg. Yes in Age and
No in Other organic grave good).
This gives you a list of all
the burials featuring the properties you picked. From there you can go to the
specific Organic Grave Good by clicking ID. Clicking on the name of
the Burial (under Burial) will bring you to the general information page on
this burial.
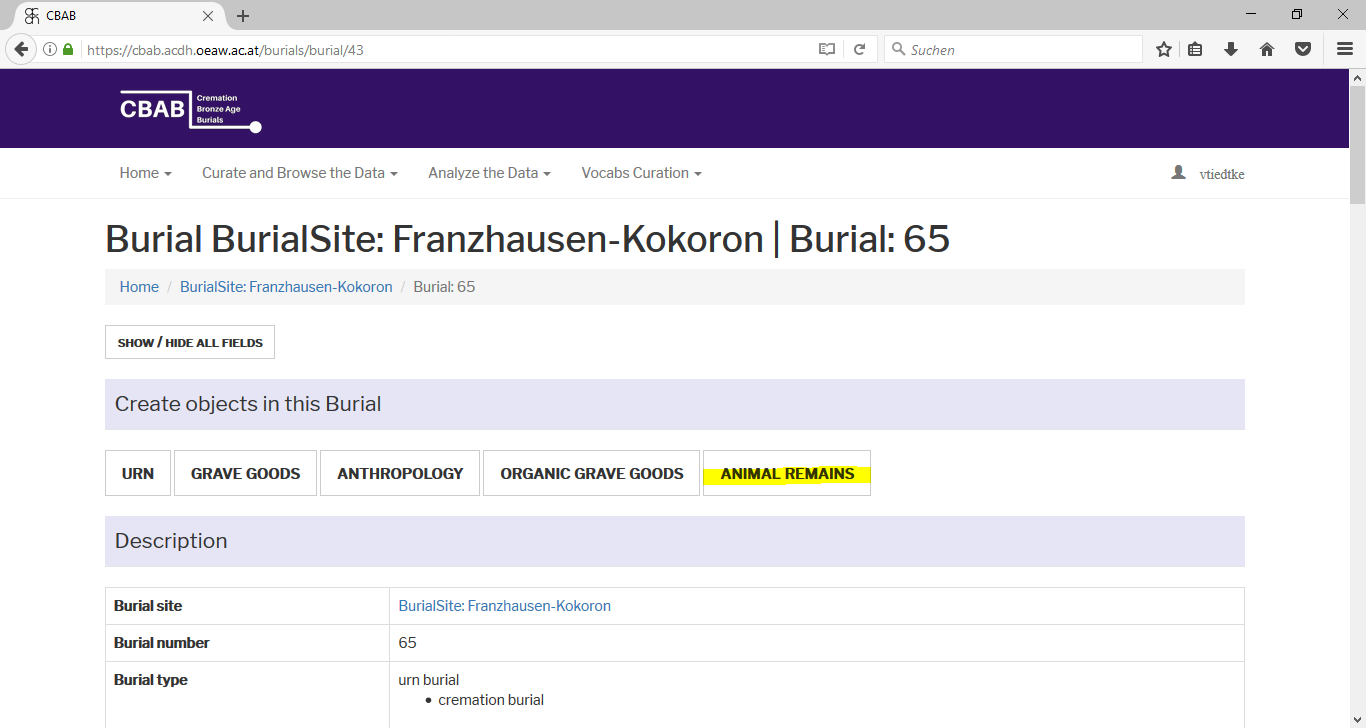
How to enter Animal Remains
There are two different ways to create an Animal Remains.
- First you have to create a burial (see above How to create a Burial).
- Caution! Using method B) means you have first to pick the burial and urn from the list provided in Burial and Urn on top of the page. The list features every burial and every urn in the database!
- Create/Edit Animal Remains. Fill out all the boxes mainly using the drop-down-lists and adding information from the zoological report.
On the general page of the burial there is the category Create objects in this Burial where you choose the button Animal Remains Goods (continue with C). Since this is the easier way, we highly recommend using this method! By following it you cannot mix up the burials.
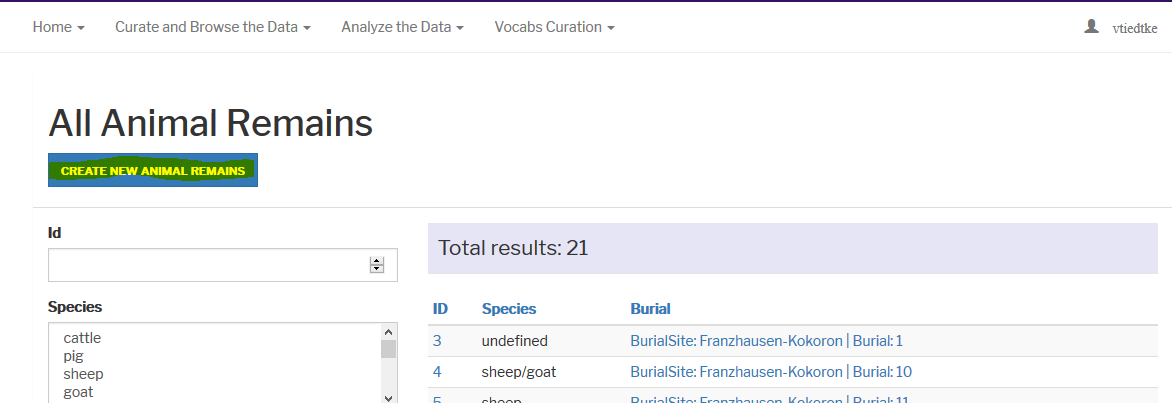
Go to Curate and Browse the Data and choose Animal Remain.
This
brings you to the page All Animal Remains, where you can use the button
Create New Animal Remains.
You will be directed to Create/Edit Animal Remains. First two fields are Burial and Urn. Here you must choose a specific Burial/Urn which correlates to the Animal Remains you are entering!
After that you can proceed with the Animal Remains properties (Age, Sex etc.).
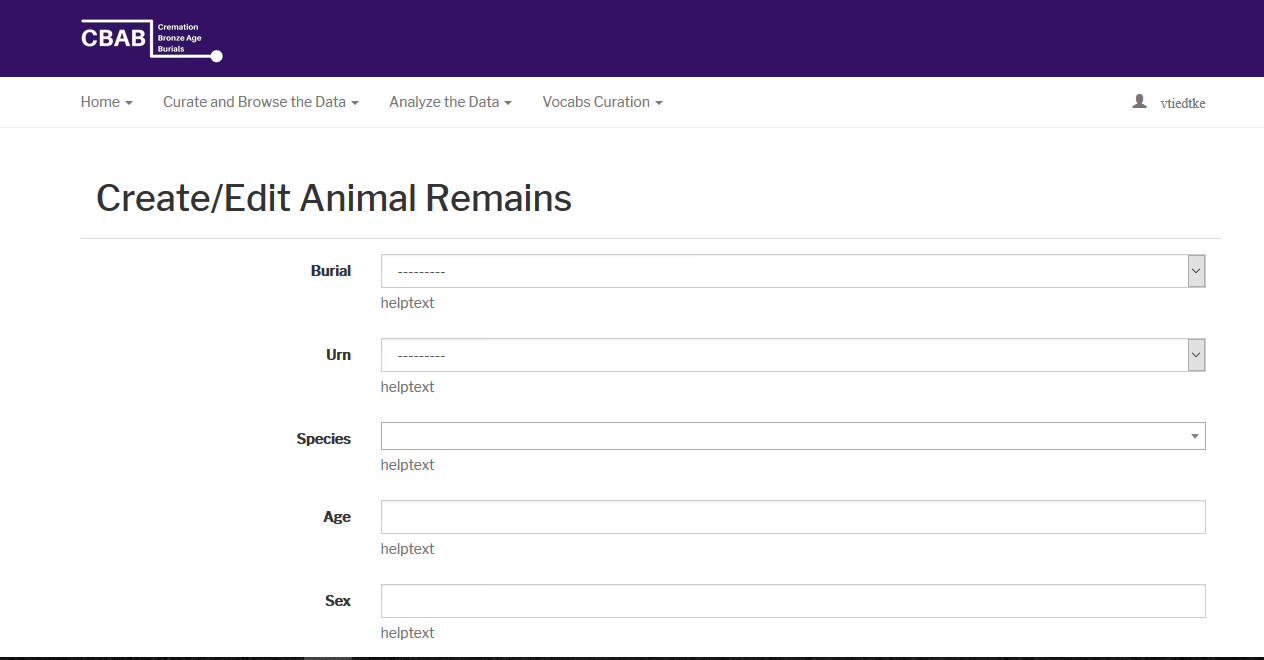
In the text box Comment you can add important details (e.g. the inventory
number mentioned in the catalogue/excavation documentation or the body side
being reflected in the animal remains).
Caution: Age and Sex
are rarely analysed. If you do not have any information on this, just leave the
boxes empty.
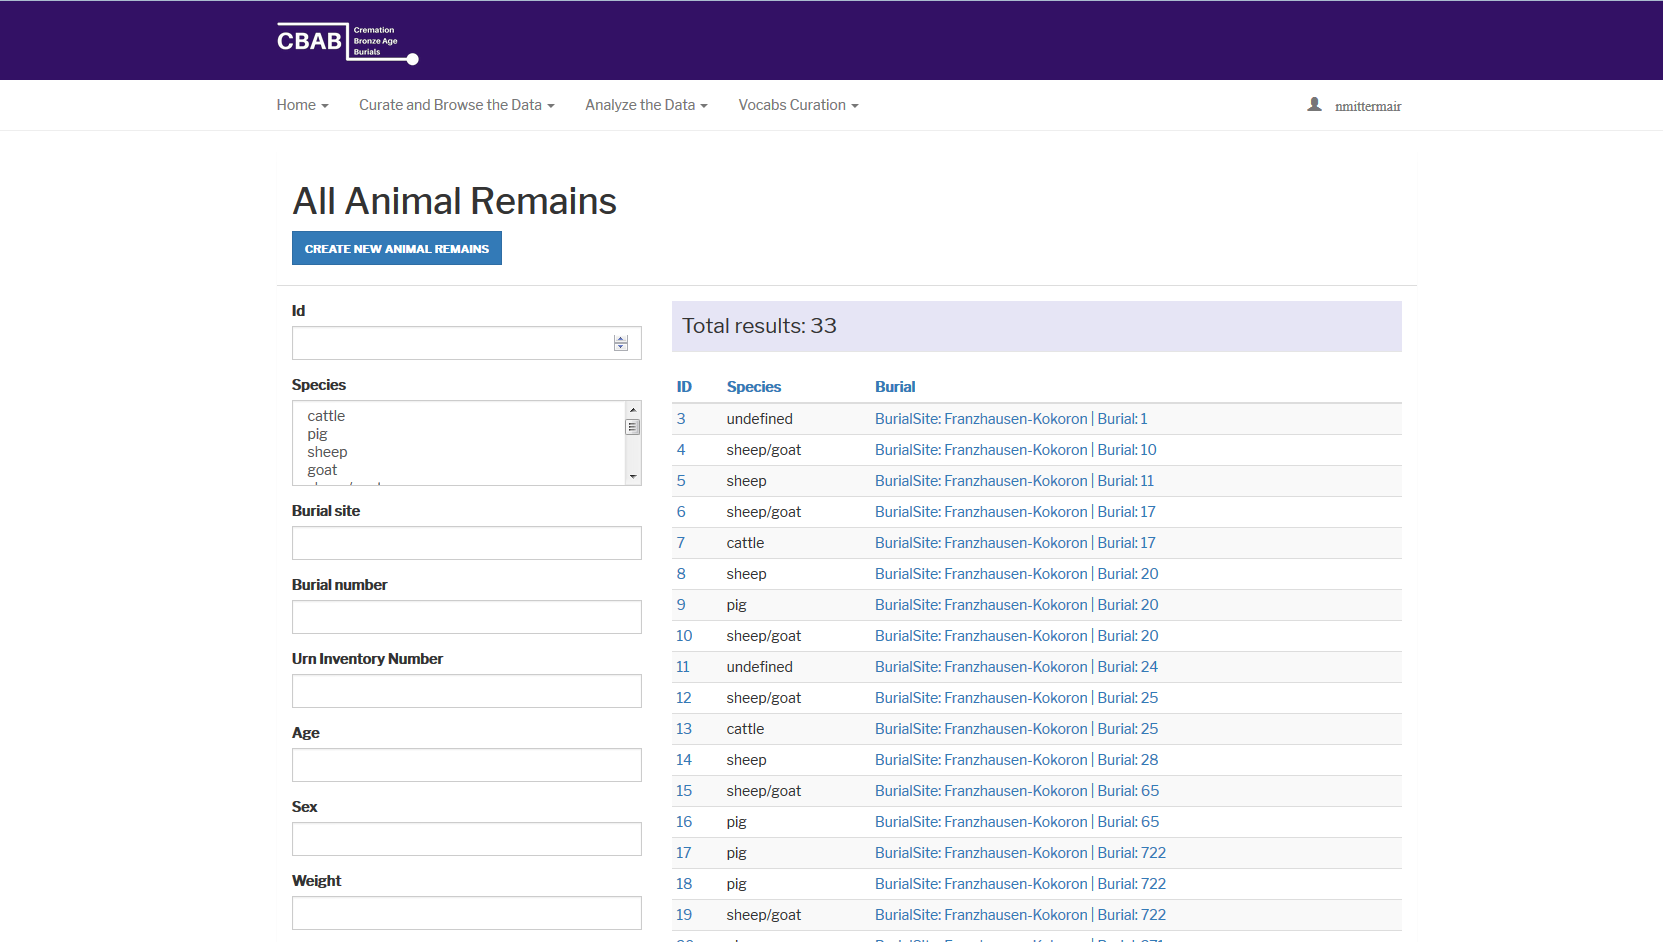
How to browse or search for Animal Remains
Browse the database:
First click Curate and Browse the Data and choose Animal Remains.
This
brings you to the All Animal Remains with the list of all Animal Remains in
database (on the right side of the screen). By clicking on the ID you will
see Description of the specific Animal Remain with all properties
(Age, Sex etc.). Clicking on one of the Burials from the list Burial, you
will get all general information regarding this specific burial.
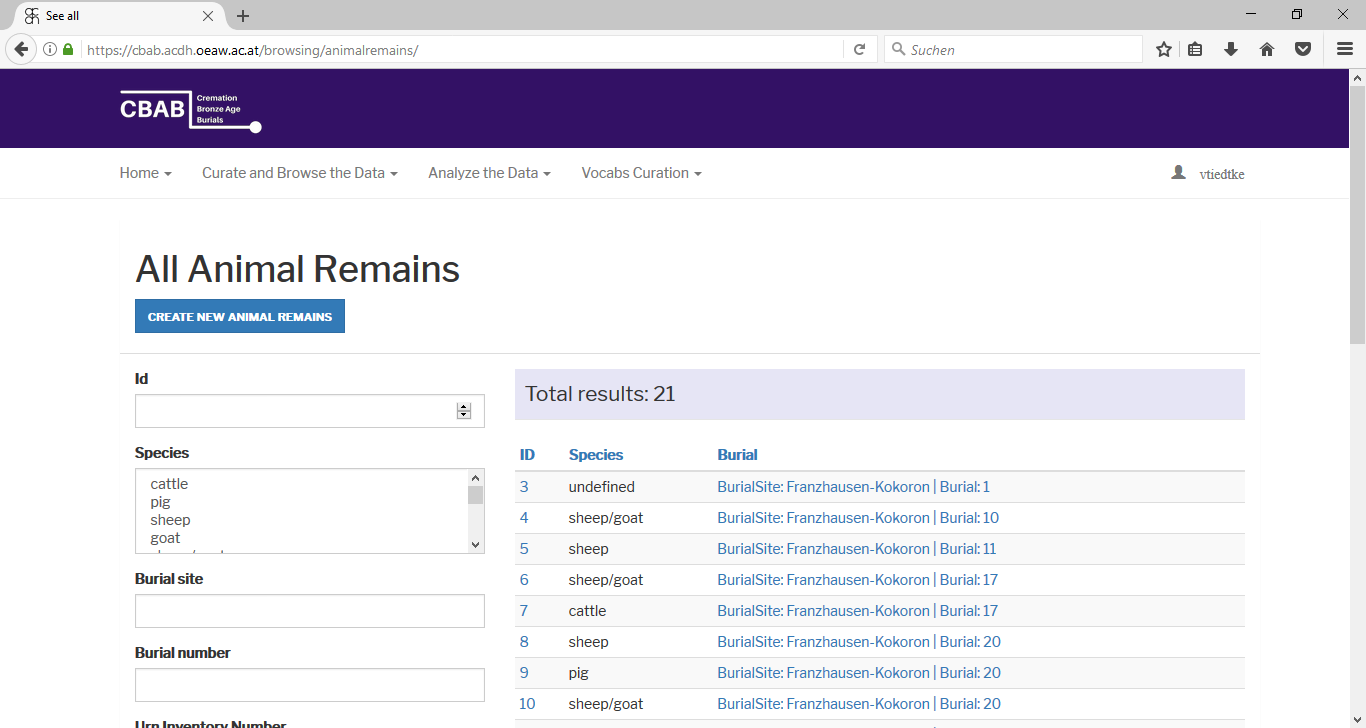
If you look for Animal Remains with special properties:
First go to Curate and Browse the Data and choose Animal
Remains.
This brings you to the All Animal Remains page. You can
choose the specie you are looking for and combine this with different terms
concerning the Burial, Age, Sex, Weight, Position
and Amount in boxes by filtering in the left of the page.
Pick the things
you are interested and click Search.
This gives you a list of all the
burials featuring the properties you picked. From there you can go to the specific
Animal Remain by clicking ID. Clicking on the name of the Burial
(under Burial) will bring you to the general information page on this
burial.
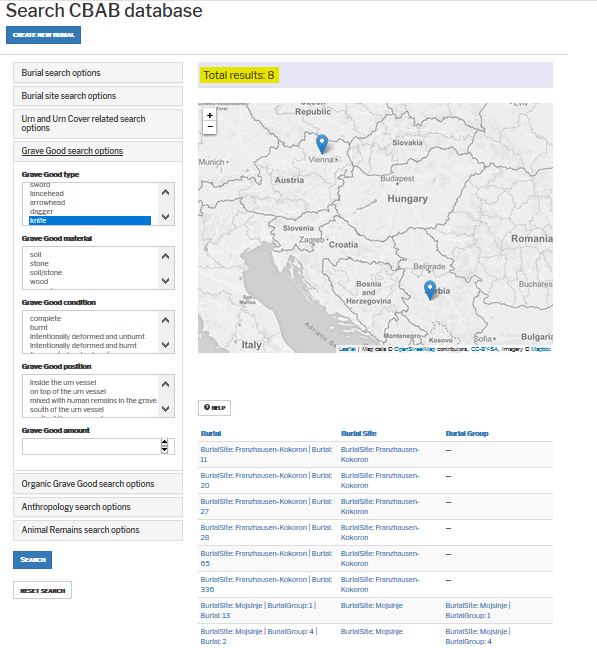
How to analyze the Data
You can search for basically anything in the cbab-database and combine different queries. E. g., you can search for all female graves with bronze bracelets originating from burial sites located on a terrace.
For the inquiries of the database go to analyze the Data and from there to search database.
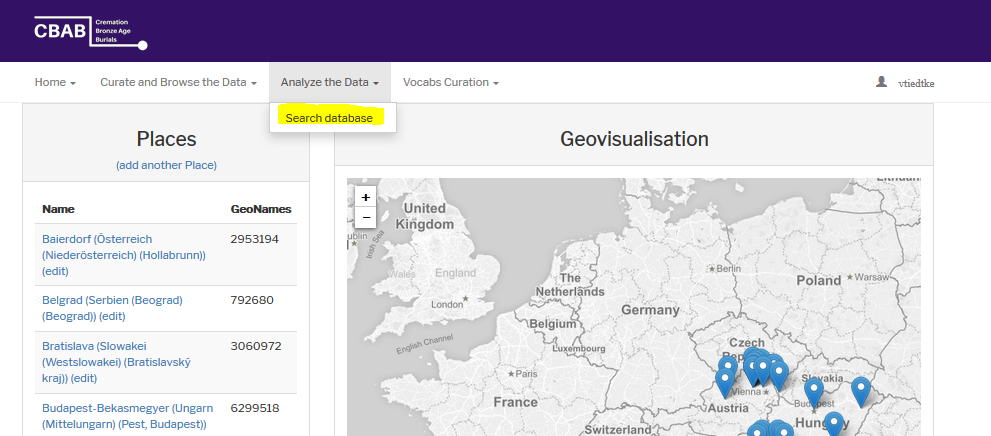
Then there will open a window where you can search for all the properties that you are interested in.
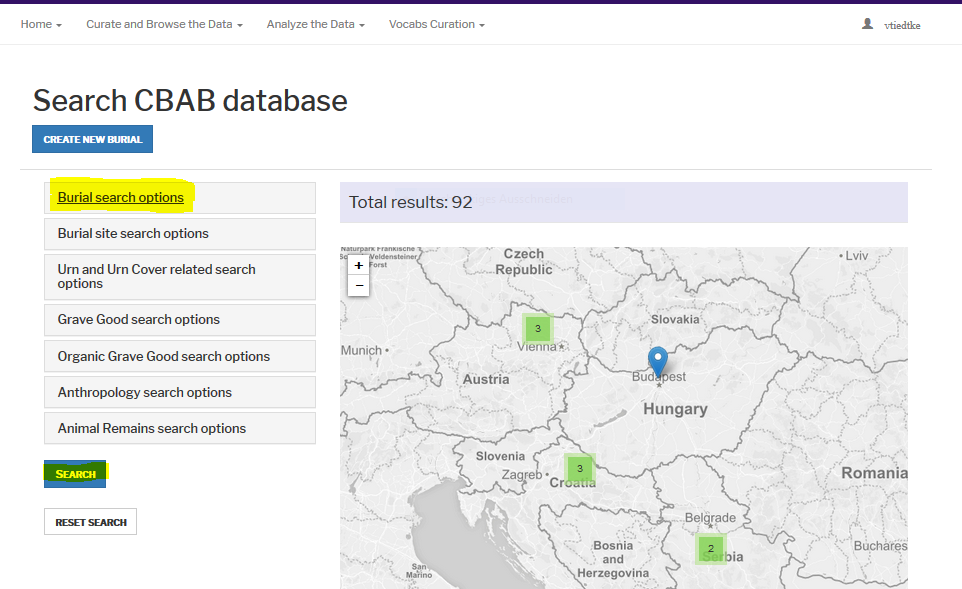
Each box on the left in the window can be opened and you can pick the properties.
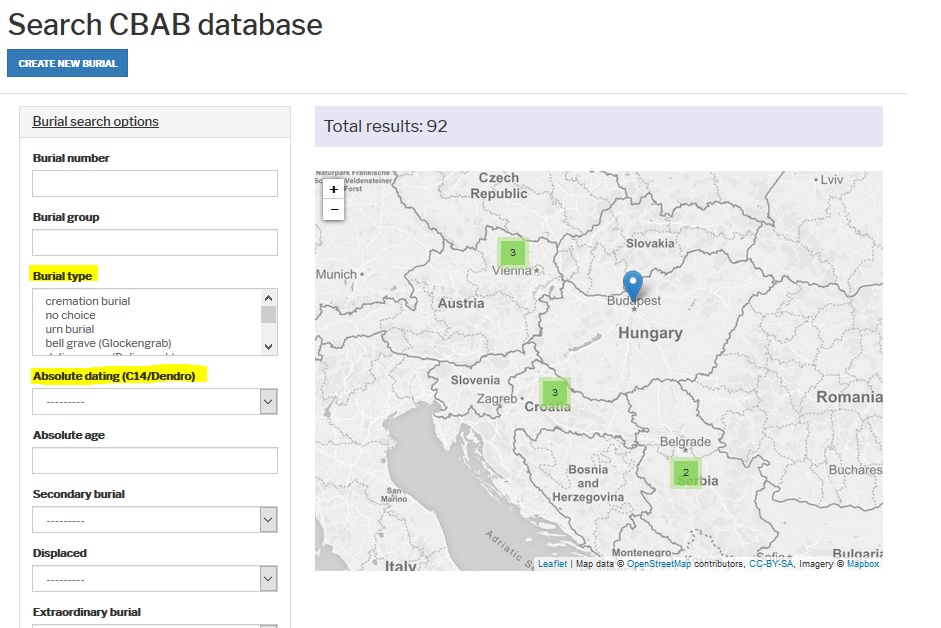
You can also combine all the properties (Burial Site, Grave Good, Anthropology, etc.) you are interested in.
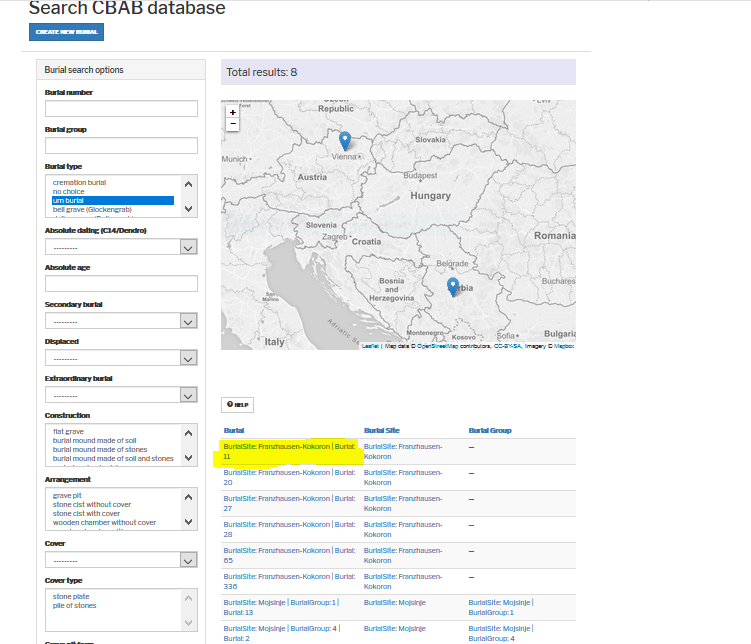
- just by picking them from the boxes on the left. This will provide you with a list on the bottom of the map, where the graves containing your properties (e. g. urn burials with female deceased).
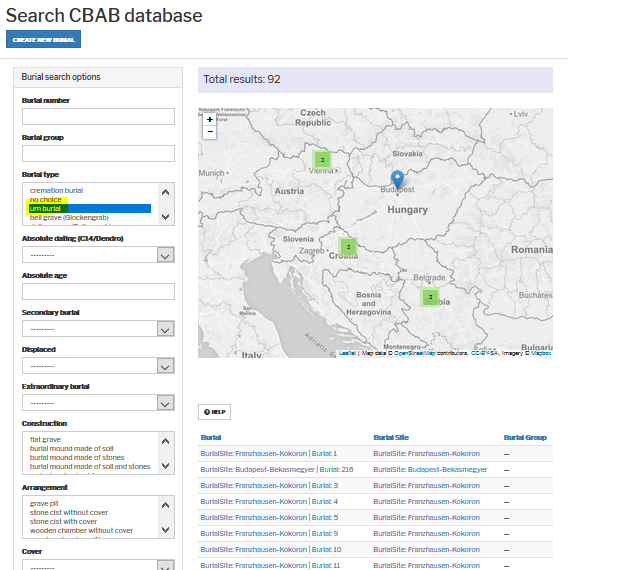
- You start with one property and narrow the list down to the things you are interested in; e. g. you first choose all Urn burials (in the box Burial search options). This will bring you to the map and list of all Urn Burials in the database.
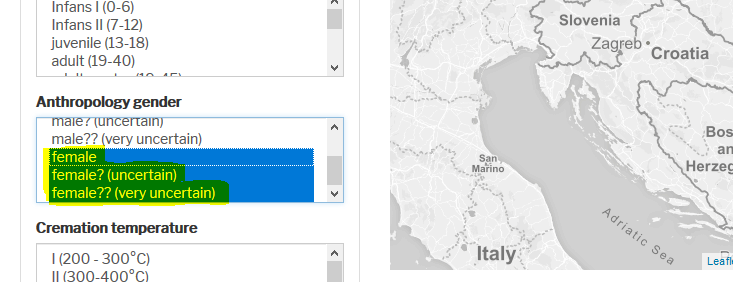
There is the possibility to do a multiple choice from the lists by pressing CTRL and picking several options (e.g. Female, Female uncertain, Female very uncertain).
Afterwards you can additional property (e.g. knife from the box Grave Good search options) and press Search. This will narrow down your previous choice and you will get a map and a list of urn burials containing knife.
From there you can continue as long as you like by choosing additional properties. For instance, you can filter your list of urn burials with knifes by picking anthropological information (Box Anthropology search options) or other grave goods or any other criteria form the boxes.
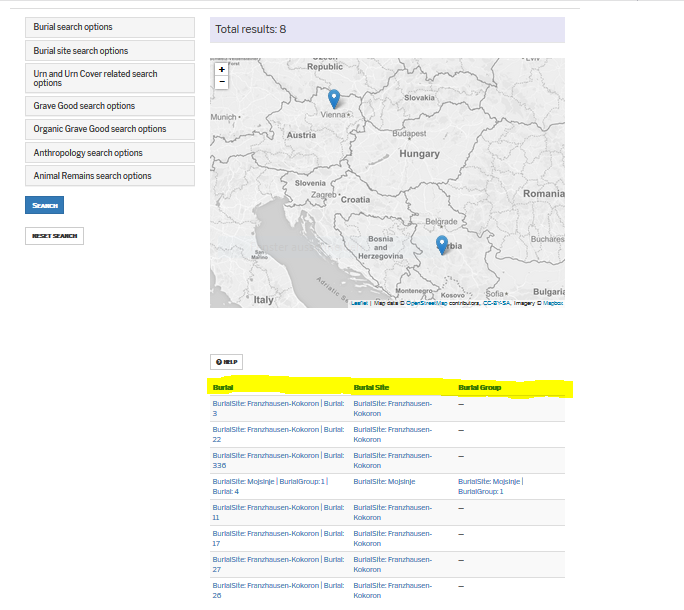
How to come to the single burials of your filtered list
From your filtered list you can go to the single burials by clicking on the grave you are interested in. It will bring you to the general information page on this burial.
How to start a new search
If you want to start a new search just click Reset Search and you can start from the beginning.